Hello everyone! It's been a rough week, but it's finally over... so let's the relax begins! I created a sweet card with one of my favorite color combinations: white, kraft, rose colors and a bit of gold. In particular this is a swing card, since I loved the one I made for a Holy Communion few weeks ago. I used the one of the Cerchi Big dies for the interactive mechanism, which gives a twist to the whole project.
Ciao a tutti! E' stata una settimana tosta, ma finalmente è finita... e quindi diamo il via al weekend e al relax! Ho creato una dolce card con una delle mie combinazioni preferite: bianco, kraft e rosa, con un pizzico di oro. In particolare si tratta di una swing card, visto che mi sono divertita molto a realizzare questa per la Prima Comunione qualche settimana fa. Anche in questo caso mi sono fatta aiutare dalle fustelle Cerchi Big, che hanno dato una marcia in più all'intero progetto.
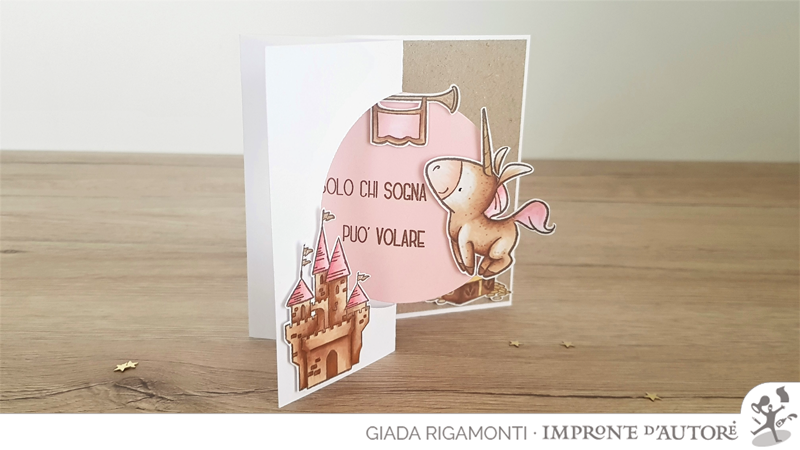
I decided to combine Dante e Bo stampset with a sentiment from Neverland stampset. I stamped a bunch of images with Memento Cocoa ink and colored them with Illustrator markers and a bit of gold for details.
Ho deciso di mettere insieme il set di timbri Dante e Bo con l'augurio dal set Neverland. Ho timbrato un po' di immagini con dell'inchiostro Memento Cocoa e le ho colorate con i pennarelli Illustrator ed una penna oro per i dettagli.

Ho optato per l'unicorno, lo stendardo, il tesoro ed il castello ed ho utilizzato gli stessi colori che ho scelto per i cartoncini.

I glued everything on the front with foam adhesive, except for the treasure which is on the inside in order to help the card to stay close.
Ho incollato il tutto sul fronte della card con del nastro gommato, ad eccezione del tesoro che ho fissato all'interno, così da aiutare la card a rimanere chiusa.

Ho posizionato un cartoncino kraft all'interno e un cerchio rosa sul fronte della struttura. Sul cerchio ho timbrato la scritta sempre con dell'inchiostro Memento Cocoa.

Adoro il risultato finale, penso che sia un biglietto perfetto per coloro che hanno la testa tra le nuvole o per piccole donne che amano gli unicorni!