Copyright giadaelesuenuvole.blogspot.it. Powered by Blogger.

giadalesuenuvole

Pagine

  • Chi sono
  • Privacy Policy


Hello my friends! Today I'm on Some Odd Girl blog to tell you how this card was born. In fact, my first idea was to make a spooky card with this Mini Clown digi stamp, inspired by horror movies. As I was coloring it, I changed my mind and I decided to make something different, uncategorized, with a sort of "Circus" atmosphere.

Ciao a tutti! Oggi sono sul blog di Some Odd Girl per raccontarvi come è nata questa card. Infatti ero partita con l'idea di realizzare qualcosa per Halloween con questo Mini Clown, ispirandomi ai film horror (che tanto non vedo mai!). Mentre lo stavo colorando, ho cambiato idea e ho deciso di realizzare qualcosa di diverso, fuori dagli schemi, con una sorta di atmosfera da circo.


I followed my instinct and I chose a color palette made of grey, red, yellow and blue. 
I drew some stars all around the clown and fussy cut everything. I glued the panel on a grey cardbase with foam tape, I stamped the sentiment that say "smile, cheese" and I went for a snarky card.

Ho seguito l'istinto e ho scelto una palette di colori fatta di grigi, rossi, gialli e blu.
Ho disegnato qualche stella intorno al clown e ho ritagliato tutto. Ho incollato il pannello su una base grigia, dandogli rilievo con del nastro gommato. Ho timbrato la scritta e ho deciso di concludere una card irriverente.


I laugh every time I see the sentiment and the clown's face! 
In general I love to plan in advance what to do because I work more focused, but changing my mind is a great way to end up with something new - even if the process is more time consuming!

Rido ogni volta che vedo la scritta e la faccia del clown!
In generale adoro programmare in anticipo cosa fare, perché la cosa mi permette di concentrarmi e risparmiare tempo, ma cambiare idea e andare avanti a istinto è un ottimo modo per realizzare qualcosa di diverso!
Share
Tweet
Pin
Share
No commenti

Hello stampers! Today I have an Halloween card for you, made with Crackerbox & Suzy Stamps supplies. It isn't a spooky one, since I added googly eyes to make the final result funnier. A quick reminder: all Halloween stamps are 20% off until the end of September!


Ciao a tutti! Oggi sono qui a mostrarvi una card di Halloween, realizzata con timbri di Crackerbox & Suzy Stamps. Non si tratta di una card spaventosa, visto che ho aggiunto due paia di occhietti per rendere il tutto più divertente. Vi ricordo che fino a fine settembre i timbri a tema Halloween sono scontati del 20%!


I began with a violet cardstock, on which I blended Seedless Preserves and Black Soot Distress Inks. I left the center quite light, adding more colors on the edges.

Ho cominciato con del cartoncino viola, su cui ho sfumato gli inchiostri Distress Seedless Preserves e Black Soot. Ho lasciato il centro abbastanza chiaro, aggiungendo colore solo sui bordi.


Thanks to my MISTI tool, I stamped the Bare Tree Tall multiple times all around the edges, using Versafine Black ink.

Grazie al MISTI, ho timbrato l'immagine Bare Tree Tall più volte, sempre lungo i contorni, utilizzando del Versafine nero.


At this point I stamped a couple of ghosts, put different sizes of googly eyes on both and fixed them down in the center of the card with foam tape.

A questo punto ho timbrato un paio di fantasmi, ho aggiunto 2 occhietti a entrambi e li ho incollati al centro della card con del nastro adesivo gommato.


Finally I stamped the sentiment with Versamark Ink at the bottom of the panel, I covered it with white embossing powder and heat embossed.

Infine ho timbrato la scritta con del Versamark sulla parte bassa del pannello, ho coperto il tutto con della polvere da embossing e ho embossato.

Supplies used:

Bare Tree Tall
Ghost Vamp
Happy Haunting Drips


Share
Tweet
Pin
Share
No commenti


Hello there! What about a pinky birthday card today? I made this one starting from the Virgo digi stamp by Some Odd Girl, which is free during the month of September. Her dress made me think of a little girl in pink, so I keep this color as main focus of the card.

Ciao a tutti! Cosa ne dite di un compleanno in rosa? Ho realizzato questa card cominciando con il timbro Virgo di Some Odd Girl, che è scaricabile gratis per tutto il mese di settembre. Il suo vestito mi ha fatto subito pensare a una piccola ragazza in rosa, per cui ho mantenuto questo colore come focus principale della card.


At the beginning I thought of a shaped card, so I colored the girl with promarkers and die cut with a circle die. The colors I used are pink, yellow and green.

All'inizio ho pensato di realizzare una card dalla forma particolare, per cui ho colorato la ragazzina con i promarkers e ho utilizzato una fustella a cerchio per ritagliarla. I colori che ho utilizzato su di lei sono rosa, giallo e verde.


Finally I put everything on a regular cardbase, adding a piece of patterned paper and a strip of vellum with heat embossed sentiment.

Alla fine ho messo tutto insieme su una base rettangolare, aggiungendo della carta pattern e del vellum su cui ho embossato in bianco l'augurio.

Share
Tweet
Pin
Share
No commenti


Hello my friends! September is here, so it's time to come back to school in Italy. I remember what it feels like: new books, customized agenda, meeting old and new friends. As soon as I saw this Bookbag Tobie Digi Stamp by Some Odd Girl I decided to create my very first "Back to School" card.

Ciao a tutti! Settembre è qui, il che significa che è tempo di rientri a scuola. Ricordo ancora cosa si prova: l'odore dei libri di testo nuovi, il diario tutto da personalizzare, incontrare nuovi e vecchi amici. Non appena ho visto il timbro digitale Bookbag Tobie di Some Odd Girl, ho deciso di creare la mia primissima card "Back to School".


I colored Tobie with brown, blue and red colors of Promarkers, trying to make it looks like a good guy.

Ho colorato Tobie con i promarkers marroni, blu e rossi, nell'intento di renderlo il classico bravo ragazzo.


Finally I used a couple of patterned paper and a frame die, as I was inspired by the pictures taken the first day of school.

Infine ho utilizzato un paio di carte decorate e una fustella a forma di foto, visto che mi sono ispirata alle foto che vengono fatte il primo giorno di scuola.
Share
Tweet
Pin
Share
No commenti

Hello my friends! Today I'm sharing this simple card for Crackerbox & Suzy Stamps that everyone can reproduce with minimum supplies.

Ciao a tutti! Oggi vi mostro una semplicissima card realizzata per Crackerbox & Suzy Stamps che chiunque può riuscire a riprodurre con anche pochissimi strumenti.


First I stamped the Ornament Bulb Stripe multiple times on a piece of light blue cardstock using Versamark ink. I also tried to make 4 rows, rotating the stamp from one to another. To make the background more interesting, I heat embossed the images with clear embossing powder.

Prima di tutto ho timbrato la pallina di Natale più e più volte su del cartoncino azzurro, utilizzando l'inchiostro Versamark. Ho anche cercato di creare 4 file, ruotando l'immagine tra una timbrata e l'altra. Per rendere ancora più interessante lo sfondo, l'ho embossato utilizzando la povere trasparente.


At this point I added a bit of depht by shading the bulbs with prismacolor pencils in blue and white shapes.

A questo punto ho deciso di aggiungere un po' di profondità ombreggiando ogni singola pallina con matite prismacolor blu e bianca.


For ending the project I only needed a sentiment: I added an italian one that says "I wish you a magical Christmas". As you can see, you can achieve beautiful results by using 2 stamps only!

Per terminare il tutto ho solo dovuto aggiungere un augurio. Come potete vedere, è possibile raggiungere ottimi risultati anche solo utilizzando 2 timbri in croce!


Supplies used:

New Ornament Bulb Stripe


Share
Tweet
Pin
Share
2 commenti

Hello my friends! Today we're celebrating another mini-release by Crackerbox & Suzy Stamps, full of witches and Halloween stamps. Do you see something you like? Well, from today until September 10th all the images of the new release is 20% off!


Ciao a tutti! Oggi festeggiamo un'altra release di Crackerbox & Suzy Stamps, ricca di streghe e di timbri dedicati ad Halloween. Vedete qualcosa che vi piace? Ebbene, fino al 10 settembre tutte le immagini della nuova release sono scontate del 20%!


First of all I stamped the Star Twinkle stamp multiple times on a piece of black cardstock using Versamark Ink. Then I covered everything with clear embossing powder and heat embossed.

Prima di tutto ho timbrato queste stelline più volte su del cartoncino nero, utilizzando l'inchiostro Versamark. Poi ho coperto il tutto con la polvere trasparente e ho embossato.


Then I stamped the Potion Bottle and the new Cauldron images on some white cardstock with Memento Tuxedo Black Ink. This ink is perfect for coloring with alcohol markers.

Poi ho timbrato la Pozione e il nuovissimo Calderone su del cartoncino bianco, stavolta sfruttando le proprietà dell'inchiostro Memento nero: è perfetto per colorare con i pennarelli ad alcohol.


After coloring and fussy cutting the stamps, I took a piece of grey cardstock, I stamped lots of stars and the sentiment from a previous release.

Dopo aver colorato e ritagliato le immagini, ho preso del cartoncino grigio, ho timbrato un sacco di stelline e uno dei sentiment rilasciati in precedenza.


Finally I die cut a window from the black panel, as the idea was to make a magic potion from the cauldron (that's what you see when you open the window).

Infine ho fustellato una finestra dal pannello nero, visto che l'idea era quella di realizzare una pozione magica grazie al calderone (e questo è ciò che vedete una volta aperta la finestra).


I added some highlights on the images with a white gel pen.

Ho aggiunto qualche punto luce utilizzando una penna gel bianca.


This Blog Hop is open to left comments until September 10th at 11:59. Randomly will be selected 2 winners from all the visitors that left a comment in all blogs. Each winner will receive a $25 gift card from Crackerbox Store. Plus, free shipping for orders over $20 in USA and for international orders over $30. Join us!

Questa Hop accetta commenti fino al 10 Settembre, dopodiché verranno scelti due fortunati che avranno commentato su tutti i blog. Entrambi riceveranno una gift card da 25$!
Inoltre le spese di spedizione sono gratuite per ordini sopra i $20 negli USA e per tutti gli altri ordini sopra i $30. Unitevi a noi!
You are invited to the Inlinkz link party!
Click here to enter
We're keeping on playing with the sale category of the month: during the month of September, every Halloween stamp is 20% off! Let's shop here!


Stiamo continuando a portare avanti gli sconti mensili: durante il mese di settembre, tutti i timbri a tema Halloween sono scontati del 20%! Approfittatene qui!

Supplies used:


Cauldron


Star Twinkle
Potion Bottle Lg.
Be Scary

Share
Tweet
Pin
Share
7 commenti

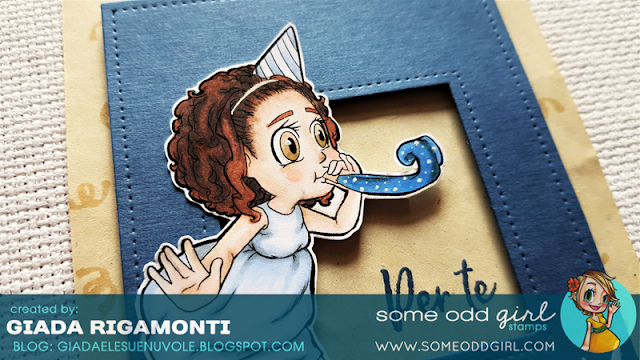
Hello Oddies! For today's card I focused on a color combination: when I feel like I need new inspiration, I search for videos, images or new color combinations. In this case I worked with blues, kraft, brown and white colors, which I used to color and match the Party Tia digi stamp by Some Odd Girl.
Everything is quite simple here: I printed and colored Tia using alcohol markers. Then I fussy cut.

Ciao a tutti! Per realizzare la card di oggi mi sono concentrata su una combinazione di colori: quando mi sembra di creare sempre le stesse cose, cerco nuovi video, immagini...o nuove combo di colori. In questo caso ho deciso di lavorare con i blu, il kraft, il marrone ed il bianco, tutti colori che ho utilizzato sull'immagine Party Tia di Some Odd Girl.
Il risultato finale è davvero molto semplice: ho stampato e colorato Tia utilizzando i pennarelli ad alcohol, poi l'ho ritagliata.


Next I took a piece of kraft cardstock, fullfilled by stamping a little image here and there. Finally I die cut a piece of blue cardstock to create a sort of frame and a piece of white cardstock with a grass border. The sentiment says "For you"!

Poi ho preso del cartoncino kraft, che ho riempito timbrando qua e là una piccolissima immagine a tema. Infine ho fustellato del cartoncino blu per realizzare una sorta di cornice e del cartoncino bianco per ricavare del prato dove far poggiare Tia.
Share
Tweet
Pin
Share
No commenti
Newer Posts
Older Posts

About me

About me
I'm Giada, an italian cardmaker. I love clean and simple cards...and coloring critters! Thank for being here!

Follow Me

  • Facebook
  • Instagram
  • Youtube

Contact me

Nome

Email *

Messaggio *

Blog Archive

  • ▼  2023 (3)
    • ▼  nov 2023 (1)
      • Winter Friends
    • ►  giu 2023 (1)
    • ►  feb 2023 (1)
  • ►  2022 (14)
    • ►  ott 2022 (1)
    • ►  ago 2022 (1)
    • ►  lug 2022 (2)
    • ►  giu 2022 (1)
    • ►  mag 2022 (1)
    • ►  apr 2022 (1)
    • ►  mar 2022 (3)
    • ►  feb 2022 (1)
    • ►  gen 2022 (3)
  • ►  2021 (27)
    • ►  dic 2021 (1)
    • ►  nov 2021 (1)
    • ►  ott 2021 (2)
    • ►  set 2021 (2)
    • ►  ago 2021 (3)
    • ►  lug 2021 (2)
    • ►  giu 2021 (1)
    • ►  mag 2021 (2)
    • ►  apr 2021 (2)
    • ►  mar 2021 (2)
    • ►  feb 2021 (5)
    • ►  gen 2021 (4)
  • ►  2020 (72)
    • ►  dic 2020 (2)
    • ►  nov 2020 (2)
    • ►  ott 2020 (4)
    • ►  set 2020 (8)
    • ►  ago 2020 (4)
    • ►  lug 2020 (7)
    • ►  giu 2020 (8)
    • ►  mag 2020 (5)
    • ►  apr 2020 (12)
    • ►  mar 2020 (7)
    • ►  feb 2020 (7)
    • ►  gen 2020 (6)
  • ►  2019 (68)
    • ►  dic 2019 (6)
    • ►  nov 2019 (8)
    • ►  ott 2019 (9)
    • ►  set 2019 (9)
    • ►  ago 2019 (8)
    • ►  lug 2019 (8)
    • ►  giu 2019 (3)
    • ►  mag 2019 (4)
    • ►  apr 2019 (2)
    • ►  mar 2019 (3)
    • ►  feb 2019 (4)
    • ►  gen 2019 (4)
  • ►  2018 (59)
    • ►  dic 2018 (2)
    • ►  nov 2018 (7)
    • ►  ott 2018 (7)
    • ►  set 2018 (7)
    • ►  ago 2018 (7)
    • ►  lug 2018 (6)
    • ►  giu 2018 (4)
    • ►  mag 2018 (4)
    • ►  apr 2018 (4)
    • ►  mar 2018 (4)
    • ►  feb 2018 (3)
    • ►  gen 2018 (4)
  • ►  2017 (45)
    • ►  nov 2017 (6)
    • ►  ott 2017 (3)
    • ►  set 2017 (5)
    • ►  ago 2017 (3)
    • ►  lug 2017 (3)
    • ►  giu 2017 (3)
    • ►  mag 2017 (3)
    • ►  apr 2017 (5)
    • ►  mar 2017 (3)
    • ►  feb 2017 (6)
    • ►  gen 2017 (5)
  • ►  2016 (32)
    • ►  dic 2016 (1)
    • ►  nov 2016 (6)
    • ►  ott 2016 (3)
    • ►  set 2016 (3)
    • ►  ago 2016 (3)
    • ►  lug 2016 (4)
    • ►  giu 2016 (4)
    • ►  mag 2016 (2)
    • ►  apr 2016 (1)
    • ►  mar 2016 (2)
    • ►  feb 2016 (2)
    • ►  gen 2016 (1)
  • ►  2015 (21)
    • ►  dic 2015 (1)
    • ►  nov 2015 (2)
    • ►  set 2015 (1)
    • ►  ago 2015 (2)
    • ►  lug 2015 (1)
    • ►  mag 2015 (1)
    • ►  apr 2015 (2)
    • ►  mar 2015 (4)
    • ►  feb 2015 (4)
    • ►  gen 2015 (3)
  • ►  2014 (31)
    • ►  dic 2014 (2)
    • ►  nov 2014 (2)
    • ►  ott 2014 (2)
    • ►  set 2014 (4)
    • ►  ago 2014 (1)
    • ►  lug 2014 (3)
    • ►  giu 2014 (3)
    • ►  mag 2014 (3)
    • ►  apr 2014 (2)
    • ►  mar 2014 (3)
    • ►  feb 2014 (3)
    • ►  gen 2014 (3)
  • ►  2013 (33)
    • ►  dic 2013 (4)
    • ►  nov 2013 (5)
    • ►  ott 2013 (4)
    • ►  set 2013 (3)
    • ►  ago 2013 (4)
    • ►  lug 2013 (5)
    • ►  giu 2013 (8)

Search

Labels

  • crackerbox & suzy stamps
  • craftin desert divas
  • create a smile stamps
  • lawnfawn
  • mft stamps
  • rinea foiled paper
  • so suzy stamps
  • someoddgirl
  • whimsy stamps
  • wplus9

Created with by BeautyTemplates