Copyright giadaelesuenuvole.blogspot.it. Powered by Blogger.

giadalesuenuvole

Pagine

  • Chi sono
  • Privacy Policy


Hello! Christmas is getting close... and I'm late! So I'm planning to create and share lots of Holiday cards until Christmas, and this one is made with Crackerbox & Suzy Stamps supplies. In particular I fullfilled my card with the new Holly Branch stamp, that I colored with TouchFive markers.

Ciao a tutti! Natale si sta facendo sempre più vicino...ed io sono in ritardo (ma dai?!). Per cui mi sto attrezzando per creare e condividere un sacco di card natalizie da qui a Natale, e quella di oggi è realizzata con un bellissimo timbro di Crackerbox & Suzy Stamps. Si tratta di un bel rametto di agrifoglio, che ho colorato con i pennarelli TouchFive.


First I stamped a bunch of Holly branch with Memento Tuxedo Black Ink, coloured them and fussy cut. The idea behind was to fill the front panel with multiple branches.

Prima di tutto ho timbrato un po' di rami con del Memento nero, li ho colorati e ritagliati. L'idea era quella di riempire quasi tutto il pannello frontale con una miriade di rametti colorati.


Then I used some Nuvo Crystal Drops in Morning Dew on the berries to add some extra shining. I chose a kraft cardstock ad my card base, I glued the branches with regular and foam tape, I stamped an italian sentiment and I drew dashed lines all around the edges of the panel.

Poi ho utilizzato del Nuvo Crystal Drops trasparente sulle bacche per aggiungere una certa lucentezza all'insieme. Ho scelto del cartoncino kraft come base, ho incollato i rami con nastro normale e gommato, ho timbrato una scritta ModaScrap e ho tracciato delle linee tratteggiate sui bordi del pannello.


Are you ready for Christmas? Christmas stamps on Crackerbox & Suzy Stamps shop are 15% off during the month of November, so you have still time!

E voi siete pronti per il Natale? I timbri a tema sono scontati del 15% nello store di Crackerbox & Suzy Stamps per tutto il mese di novembre: c'è ancora tempo per del sano shopping!


Supplies used:
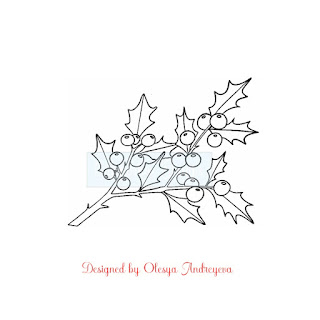
Holly Branch


Share
Tweet
Pin
Share
No commenti

Drin drin... the postbear is here! As soon as I saw the new theme of the Create a Smile blog challenge I knew I had to use this super-cute bear from Bear Mail stampset riding a bike and carrying postcards:

Drin drin... il postino è qui! Non appena ho visto il tema della nuova sfida sul blog di Create a Smile, sapevo di dover utilizzare il bellissimo orsetto dal set Bear Mail, che sta guidando una bicicletta e portando con sé cartoline, lettere e pacchetti:

In order to make it pop, I decided to color the bike in red. Then I fussy cut and glued it onto a panel on which I used the Focal Point stencil blended with Distress Oxide Fossilized Amber. The foam tape is great to add extra dimension!

Per farlo risaltare, ho deciso di colorare la bicicletta in rosso. Poi l'ho ritagliato e incollato su un pannello, su cui avevo utilizzato lo stencil Focal Point sfumato con del Distress Oxide Fossilized Amber. Il nastro gommato è perfetto per dare ulteriore rilievo!


I stamped the sentiment on a piece of white cardstock and added it at the bottom. While I was seeing the card, I thought of adding postcards here and there just to make everything more interesting. 

Ho timbrato la scritta su del cartoncino bianco e l'ho aggiunta in basso. Mentre stavo guardando questa card, ho pensato che aggiungere altre cartoline qua e là avrebbe reso tutto più interessante.


As I was placing them, the postbear seemed like a crazy driver and it made me smile... so I added more postcards and packages. 
You have 2 weeks to join us and try to win a 25€ gift certificate for Create a Smile shop! More info here!

Mentre le stavo posizionando, il postino iniziava a sembrarmi un guidatore estremo e folle...e la cosa mi ha fatto sorridere. Per questo ho aggiunto ancora più cartoline e pacchetti.
Avete 2 settimane di tempo per partecipare alla sfida e provare a vincere una gift card del valore di 25€ da utilizzare nello shop di Create a Smile! Più info qui!
Share
Tweet
Pin
Share
No commenti


Hello there! It was a long time since I created a card without any images, but with a stencil and a sentiment only. Since Crackerbox & Suzy Stamps has a huge selection of BoBunny Glitter Pastes, I wanted to give them a try!

Ciao a tutti! E' passato un po' di tempo dalla mia ultima card senza immagini...magari realizzata solamente con uno stencil e un augurio. Visto che Crackerbox & So Suzy Stamps ha un'importante selezione di paste glitter BoBunny, ho pensato di testarle e fare un tentativo!


To begin with, I picked a piece of watercolor paper and I covered it all with Cracked Pistachio Distress Oxide. I let it dry, I placed a stencil by MFT Stamps and I added a thin layer of Seafoam Glitter Paste.

Per cominciare, ho preso un foglio di carta acquerellabile e l'ho ricoperto con del Distress Oxide Cracked Pistachio. L'ho lasciato asciugare, ho posizionato lo stencil della MFT Stamps e ho aggiunto un sottile strato di Pasta Glitter Seafoam.


I set it aside to dry overnight, I stamped the sentiment with Versafine black ink on white cardstock and I framed it with black cardstock too.

Ho fatto asciugare il tutto per una notte intera, dopodiché ho timbrato l'augurio con dell'inchiostro Versafine nero su del cartoncino bianco, rifinendolo poi con una cornice di cartoncino nero.


This is the final result: I kept the layout of the card very simple, as the glitter of the paste makes the whole thing very special!

Questo è il risultato finale: ho mantenuto il tutto molto semplice, visto che già lo sbrilluccichio della pasta rende il tutto molto speciale!


The sentiment is the perfect size too!

E la scritta ha esattamente la dimensione giusta per valorizzarlo!


Supplies used:


BoBunny Glitter Paste - Seafoam
My sweet friends

Share
Tweet
Pin
Share
No commenti

Woohoo! Today it's a New Release Day on Crackerbox & Suzy Stamps: I decided to use one of the new snarky stamps and pair it with the smiling hyena of a previous release.

Wohoo! Oggi è giorno di nuova release sul sito di Crackerbox & Suzy Stamps: ho deciso di utilizzare uno dei nuovi timbri irriverenti e l'ho abbinato con la iena sorridente di una release precedente.


To begin with, I stamped the Psycho Critter with Memento Tuxedo Black ink, coloured with promarkers and fussy cut.

Per cominciare, ho timbrato la Psycho Critter con dell'inchiostro Memento Tuxedo nero, colorato con promarkers e ritagliato.


As the image of the hyena is quite big, I only had to stamp the sentiment on a piece of white paper and chose a patterned paper that would work both for a male or a female recipient.

Visto che l'immagine della iena è abbastanza grande, ho solo aggiunto la scritta che ho timbrato su del cartoncino bianco e ho scelto una carta pattern che funzionasse sia per maschi che per femmine.


The sentiment is hilarious, especially if you see the face of the hyena while you're reading it! The release is beautiful, full of Harry Potter, Christmas and also snarky sentiment and images - be sure to check it out!

La scritta è davvero ironica e simpatica, specialmente se si guarda al muso della iena mentre la state leggendo! E la nuova release è davvero bellissima, piena di timbri di Harry Potter, Natale e anche scritte irriverenti... dateci un'occhiata!

Supplies used:

Psycho Critter
Evil Done It

Share
Tweet
Pin
Share
6 commenti

Hello my friends! The new challenge on Create a Smile Stamps blog is live and the theme is "Giving Thanks", as we are approaching to Thanksgiving Day:

Ciao amici! E' appena partita la nuova sfida sul blog di Create a Smile Stamps e il tema è "Dire grazie", visto che ci stiamo anche avvicinando al giorno del Ringraziamento:


I don't own a stampset focused on Thanksgiving because we don't celebrate it in Italy, but as soon as I saw these wonderful poppies from the Clear Pure Poppies stampset I knew I could use them to say "thanks" to someone.

Non possiedo un set di timbri dedicati al Ringraziamento perché non lo celebriamo qui in Italia, ma non appena ho visto i bellissimi papaveri del set Clear Pure Poppies... ho capito che potevo utilizzarli per dire semplicemente "grazie" a qualcuno.


First I create my background with a big stain made of Candied Apple Distress Oxide and water, then I let it dry and I add some gold droplets on top.

Prima di tutto ho realizzato il mio sfondo con una bella macchina di Distress Oxide Candied Apple diluito con acqua, ho lasciato asciugare ed ho aggiunto delle gocce d'oro.


I stamped a bunch of poppies onto a piece of white cardstock, I coloured with promarkers and fussy cut.

Ho timbrato un po' di papaveri su del cartoncino bianco, li ho colorati con i promarkers e li ho ritagliati.


To finish off the card, I die cut one of the sentiment of the Cool Cuts Tiny Sentiments die-set from gold cardstock and I glued the whole panel on a kraft cardbase.

Per finire la card, ho fustellato una delle scritte presenti nel set Cool Cuts Tiny Sentiments utilizzando del cartoncino dorato. Infine ho incollato il tutto su una base kraft.


The final result makes me very happy and I hope you join us by entering the challenge: you can win a 25€ gift card to shop on Create a Smile!

Il risultato mi piace moltissimo e spero che anche voi vi unirete alla sfida: potete vincere una gift card del valore di 25€ per fare shopping presso Create a Smile!
Share
Tweet
Pin
Share
No commenti

Hi guys! Today I'm here with a card with a scent of Autumn in order to say "thanks" to someone. To make it I used a couple of stamps from Crackerbox & So Suzy Stamps images as well as a piece of patterned paper and a golden diecut sentiment.

Ciao a tutti! Oggi sono qui con una card che profuma d'autunno per dire "grazie" a qualcuno. Per fare ciò ho utilizzato un paio di timbri di Crackerbox & So Suzy Stamps così come della carta pattern e una scritta fustellata e metallizzata.

 
First I stamped a couple of pumpkins with Memento Tuxedo Black ink, coloured with promarkers and fussy cut. I did the same for three small pinecones.

Prima di tutto ho timbrato un paio di zucche con dell'inchiostro Memento nero, le ho colorate con i promarkers e le ho ritagliate. Ho fatto lo stesso con 3 piccole pigne.


Next I chose a patterned paper I had in my stash with a lot of brown, as well as a vellum circle, and I die cut a little sentiment from gold cardstock. Finally I picked an orange cardstock as my cardbase and I glued everything on top.

In seguito ho scelto della carta pattern che avevo con me da un po', un cerchio di vellum e un sentiment fustellato su del cartoncino dorato. Infine ho preso del cartoncino arancione e l'ho utilizzato come base per la mia card, incollandoci tutto sopra.


I made the pumpkins pop with a bit of foam tape, while I used regular adhesive for the pinecones in the background.

Ho fatto sì che le zucche abbiano maggior rilievo rispetto al resto grazie all'adesivo spessorato, mentre ho utilizzato del semplice nastro biadesivo per le pigne sullo sfondo.


Supplies used:

Pumpkin Plump
Pinecone sm

Share
Tweet
Pin
Share
2 commenti

Hello guys! The new challenge on Create a Smile blog is focused on one of my favorite techniques: creating your own background. There are so many ways to customize a background for a card - such as stenciling, stamping, embossing, coloring, die cutting... and so on.

Ciao a tutti! La nuova sfida sul blog di Create a Smile è focalizzata su una delle mie tecniche preferite: creare sfondi personalizzati. Ci sono tantissimi modi per farlo, per esempio utilizzando stencil, timbrando ripetutamente, embossando, colorando, fustellando... e così via.


Today I'm sharing a card in which I stamped my background using geometric images from Clear Going Graphic stampset and a specific color palette that I saw in a beautiful store. In fact, the first thing I did was choosing the inks for the card: mint, yellow and grey. I used 3 different triangles to built my background and create a sort of pattern. 

Oggi vi mostro una card in cui ho timbrato il mio sfondo utilizzando immagini geometriche dal set Clear Going Graphic e una color palette specifica che ho visto accostata in un bellissimo negozio di home decor. Infatti, la prima cosa che ho fatto è stata scegliere i tamponi per la card: menta, giallo e grigio. Ho utilizzato 3 diversi triangoli per costruire il mio sfondo e creare una sorta di pattern.


Then I stamped the hyppo from Clear Served Up! stampset with Memento Tuxedo black ink and coloured it with promarkers. 

Poi ho timbrato l'ippopotamo dal set Clear Served Up! con dell'inchiostro Memento nero e l'ho colorato con i promarkers. 


Then I fussy cut it and the sentiment, that I previously stamped on a piece of grey cardstock that I cut in few strips. Finally I glued everything down, adding a piece of vellum between the background and the other elements to make them pop even more. 
You have 2 weeks for joining us here and trying to win a 25€ gift certificate to the shop!


Quindi ho ritagliato sia l'animaletto che il sentiment, preventivamente timbrato su del cartoncino grigio che ho ritagliato in più strisce. Ho incollato il tutto sulla base, aggiungendo del vellum tra lo sfondo e gli altri elementi della card così da farli risaltare ancora di più.
Avete 2 settimane per unirvi a noi, partecipare alla sfida che trovate qui e provare a vincere un buono da 25€ per lo shop!
Share
Tweet
Pin
Share
No commenti
Newer Posts
Older Posts

About me

About me
I'm Giada, an italian cardmaker. I love clean and simple cards...and coloring critters! Thank for being here!

Follow Me

  • Facebook
  • Instagram
  • Youtube

Contact me

Nome

Email *

Messaggio *

Blog Archive

  • ▼  2023 (3)
    • ▼  nov 2023 (1)
      • Winter Friends
    • ►  giu 2023 (1)
    • ►  feb 2023 (1)
  • ►  2022 (14)
    • ►  ott 2022 (1)
    • ►  ago 2022 (1)
    • ►  lug 2022 (2)
    • ►  giu 2022 (1)
    • ►  mag 2022 (1)
    • ►  apr 2022 (1)
    • ►  mar 2022 (3)
    • ►  feb 2022 (1)
    • ►  gen 2022 (3)
  • ►  2021 (27)
    • ►  dic 2021 (1)
    • ►  nov 2021 (1)
    • ►  ott 2021 (2)
    • ►  set 2021 (2)
    • ►  ago 2021 (3)
    • ►  lug 2021 (2)
    • ►  giu 2021 (1)
    • ►  mag 2021 (2)
    • ►  apr 2021 (2)
    • ►  mar 2021 (2)
    • ►  feb 2021 (5)
    • ►  gen 2021 (4)
  • ►  2020 (72)
    • ►  dic 2020 (2)
    • ►  nov 2020 (2)
    • ►  ott 2020 (4)
    • ►  set 2020 (8)
    • ►  ago 2020 (4)
    • ►  lug 2020 (7)
    • ►  giu 2020 (8)
    • ►  mag 2020 (5)
    • ►  apr 2020 (12)
    • ►  mar 2020 (7)
    • ►  feb 2020 (7)
    • ►  gen 2020 (6)
  • ►  2019 (68)
    • ►  dic 2019 (6)
    • ►  nov 2019 (8)
    • ►  ott 2019 (9)
    • ►  set 2019 (9)
    • ►  ago 2019 (8)
    • ►  lug 2019 (8)
    • ►  giu 2019 (3)
    • ►  mag 2019 (4)
    • ►  apr 2019 (2)
    • ►  mar 2019 (3)
    • ►  feb 2019 (4)
    • ►  gen 2019 (4)
  • ►  2018 (59)
    • ►  dic 2018 (2)
    • ►  nov 2018 (7)
    • ►  ott 2018 (7)
    • ►  set 2018 (7)
    • ►  ago 2018 (7)
    • ►  lug 2018 (6)
    • ►  giu 2018 (4)
    • ►  mag 2018 (4)
    • ►  apr 2018 (4)
    • ►  mar 2018 (4)
    • ►  feb 2018 (3)
    • ►  gen 2018 (4)
  • ►  2017 (45)
    • ►  nov 2017 (6)
    • ►  ott 2017 (3)
    • ►  set 2017 (5)
    • ►  ago 2017 (3)
    • ►  lug 2017 (3)
    • ►  giu 2017 (3)
    • ►  mag 2017 (3)
    • ►  apr 2017 (5)
    • ►  mar 2017 (3)
    • ►  feb 2017 (6)
    • ►  gen 2017 (5)
  • ►  2016 (32)
    • ►  dic 2016 (1)
    • ►  nov 2016 (6)
    • ►  ott 2016 (3)
    • ►  set 2016 (3)
    • ►  ago 2016 (3)
    • ►  lug 2016 (4)
    • ►  giu 2016 (4)
    • ►  mag 2016 (2)
    • ►  apr 2016 (1)
    • ►  mar 2016 (2)
    • ►  feb 2016 (2)
    • ►  gen 2016 (1)
  • ►  2015 (21)
    • ►  dic 2015 (1)
    • ►  nov 2015 (2)
    • ►  set 2015 (1)
    • ►  ago 2015 (2)
    • ►  lug 2015 (1)
    • ►  mag 2015 (1)
    • ►  apr 2015 (2)
    • ►  mar 2015 (4)
    • ►  feb 2015 (4)
    • ►  gen 2015 (3)
  • ►  2014 (31)
    • ►  dic 2014 (2)
    • ►  nov 2014 (2)
    • ►  ott 2014 (2)
    • ►  set 2014 (4)
    • ►  ago 2014 (1)
    • ►  lug 2014 (3)
    • ►  giu 2014 (3)
    • ►  mag 2014 (3)
    • ►  apr 2014 (2)
    • ►  mar 2014 (3)
    • ►  feb 2014 (3)
    • ►  gen 2014 (3)
  • ►  2013 (33)
    • ►  dic 2013 (4)
    • ►  nov 2013 (5)
    • ►  ott 2013 (4)
    • ►  set 2013 (3)
    • ►  ago 2013 (4)
    • ►  lug 2013 (5)
    • ►  giu 2013 (8)

Search

Labels

  • crackerbox & suzy stamps
  • craftin desert divas
  • create a smile stamps
  • lawnfawn
  • mft stamps
  • rinea foiled paper
  • so suzy stamps
  • someoddgirl
  • whimsy stamps
  • wplus9

Created with by BeautyTemplates