Copyright giadaelesuenuvole.blogspot.it. Powered by Blogger.

giadalesuenuvole

Pagine

  • Chi sono
  • Privacy Policy

Hello guys! Today I'm sharing a no-spooky Halloween card, made with a cute stamp from Crackerbox Palace & So Suzy Stamps, on which I added some details. These children are so cute to focus for Thanksgiving cards, but I decided to change them a little bit for a totally different Halloween card.

Ciao a tutti! Oggi voglio condividere un'altra card per Halloween, ma stavolta non è nulla di spaventevole: si tratta di un timbro di Crackerbox Palace & So Suzy Stamps, su cui ho aggiunto qualche dettaglio. Questi due ragazzi sono troppo carini per biglietti del Ringraziamento, ma ho deciso di cambiarli un pochino per una card di Halloween diversa dal solito.


First I stamped the Pumpkin Patch with Memento ink and I coloured the image with Promarker pens. I fussy cut and I drew eyes and mouth on two of the pumpkins, covering everything with a black gel pen.

Prima di tutto ho timbrato i ragazzi con le zucche con dell'inchiostro Memento, colorandoli poi con i Promakers. Li ho ritagliati ed ho disegnato occhi e bocca a due zucche, ricoprendo i dettagli a matita con una penna gel nera.


Next I took a piece of kraft cardstock and I die cut half of a circle with the Big Shot. I stamped the sentiment with Versamark Ink and heat embossed it with white embossing powder.

In seguito ho preso del cartoncino kraft ed ho fustellato metà cerchio con la Big Shot. Ho timbrato la scritta con dell'inchiostro Versamark e l'ho embossata con della polvere bianca.


I think that they came out so adorable, with all those pumpkins around!

Penso che sono usciti proprio carini, con tutte quelle zucche intorno!


Supplies used:
Happy Haunting

Pumpkin Patch


Share
Tweet
Pin
Share
No commenti

Hello there! "Life is hard" is not only the sentiment that I used in today's card, but the current situation here. So it seems the perfect moment for the National Coffee Day blog hop - you can find all the projects made by Crackerbox Palace & So Suzy Stamps DT members here.

Ciao a tutti! "La vita a volte è incasinata" non sono solo le parole che ho deciso di utilizzare nella card di oggi, ma è anche la mia attuale situazione. Per cui sembra il momento migliore per la blog hop del National Coffee Day - potete trovare tutti i progetti realizzati dal team di Crackerbox Palace & So Suzy Stamps qui.


First I stamped the coffee cup and the spoon on a piece of white cardstock with Coffee Archival Ink. Then I fussy cut, paying attention to the center of the cup - which I cut off too. I took a piece of paper, I covered it all with tape adhesive and I coated it with brown glitter.

Prima di tutto ho timbrato la tazza di caffé e il cucchiaino su del cartoncino bianco con dell'inchiostro Archival Coffee. Poi ho ritagliato le immagini, facendo attenzione al centro della tazza - che ho eliminato. Ho preso un pezzo di carta, l'ho scoperto con del biadesivo e l'ho ricoperto con i glitter marroni.


Next I picked a piece of kraft cardstock, I drew some lines and I stamped half of the sentiment I chose in Archival Ink as well. I decided to add a strip of brown cardstock on which I wrote "before coffee" in white.

Poi ho lavorato su del cartoncino kraft, ho disegnato qualche linea e ho timbrato metà dell'augurio che avevo scelto, sempre con l'inchiostro Archival. Ho deciso di aggiungere una striscia di cartoncino marrone, su cui ho scritto "prima del caffè" in bianco.


At this point I fixed the glitter paper at the center of the cup with some foam tape and I glued everything on my cardbase. In this cup seems to be a kind of magic, isn't it?

A questo punto ho fissato la carta glitterata al centro della tazzina con del nastro gommato e ho incollato tutto sulla mia base. Nella tazzina sembra essere in atto una magia, non pensate anche voi?


Supplies used:

Coffee Cup top view

Life is hard
Spoon

Share
Tweet
Pin
Share
28 commenti

Hello my friends! My favorite season has just begun and I feel full of inspiration. As my Prismacolor pencils are keeping on calling me, I decided to color these crocus and made a little squared card just to say "hello!" for the current Create a Smile blog challenge:

Ciao amici! La mia stagione preferita è appena cominciata e mi sento ricca di ispirazione. Visto che le mie matite Prismacolor continuano a chiamarmi, ho deciso di colorare questi crochi e creare una piccola card quadrata solo per dire "ciao!", adattissima all'attuale sfida sul blog di Create a Smile:


First I stamped the three crocus images and a couple of leaves from the "Clear Crokisses" stampset on a piece of kraft paper with Versafine black ink. I took note of the prismacolor I used, so that you can try the same one to achieve a similar result: I used PC938, PC956, PC1009, PC1026, PC118 and PC917 for the crocus, while PC989, PC1005 and PC1091 for the grass. I stamped them with the MISTI tool in order to stamp them again to strengthen the edges after the coloring process.

Prima di tutto ho timbrato le tre immagini di crochi e un paio di fili d'erba dal set "Clear Crokisses" su della carta kraft con dell'inchiostro Versafine nero. Ho preso nota delle matite che ho utilizzato, così che chiunque possa utilizzare le stesse per ottenere un risultato simile: ho usato PC938, PC956, PC1009, PC1026, PC118 and PC917 per i crochi, PC989, PC1005 e PC1091 per l'erba. Ho timbrato il tutto con il MISTI così da poterci ri-timbrare sopra una volta colorati.


Then I fussy cut them and die cut a circle out of a piece of vellum. I choose the "hello" die from the Cool Cuts Tiny Sentiments set and I die cut a piece of gold cardstock, that I glued on a strip of black paper. Get inspired on Create a Smile blog and join us: you can win a 25€ gift certificate for the shop!

In seguito ho ritagliato tutto e fustellato un cerchio da del vellum. Ho scelto la fustella "hello" dal set Cool Cuts Tiny Sentiments set, che ho utilizzato su del cartoncino oro che ho a sua volta incollato su dela cartoncino nero. Lasciatevi ispirare sul blog di Create a Smile e unisciti a noi: puoi vincere un coupon da 25€ per lo shop!
Share
Tweet
Pin
Share
No commenti

Hello stampers! Today we're celebrating the brand new Catherine Pooler inks which are available in Crackerbox & So Suzy Stamps shop now! So we're showcasing these fantastic pads, that are dye inks with bright colors (and different collections). You can do a lot of things with them, for example stamping solid images perfectly as well as blending them while are still wet - get inspired here!


Ciao amici! Oggi festeggiamo l'arrivo dei nuovissimi inchiostri di Catherine Pooler nello shop di Crackerbox & So Suzy Stamps! Per cui vi mostriamo questi bellissimi tamponi, che hanno colori molto luminosi suddivisi in diverse collezioni. Si possono fare moltissime cose con loro, per esempio stampare perfettamente così come sfumarli con il blending tool mentre sono ancora umidi - lasciatevi ispirare qui!


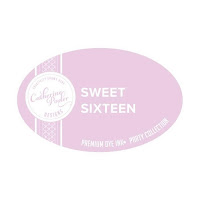
Today I wanted to create a sympathy card for a four-legged friend, in particular a dog. First I used Sweet Sixteen and Pixie Dust Inks (from the Catherine Pooler "Spring Fling" collection) and I stamped the two images of "Pet Heart set of 2" set trying to achieve an ombré effect.

Oggi ho voluto creare una sympathy card per un amico peloso, in particolare per un cagnolino. Prima di tutto ho utilizzato gli inchiostri Sweet Sixteen e Pixie Dust della collezione "Spring Fling" di Catherine Pooler per timbrare le due immagini "Pet Heart set of 2" per ottenere un effetto sfumato.


At this point I added a bit of blending, using the same inks and the blending applicators, trying to keep a smooth transition.

A questo punto ho aggiunto un po' di colore sfumando il cartoncino con gli stessi colori usati in precedenza, cercando di ottenere una una morbida sfumatura.


Then I took a couple of stamps from Crackerbox & So Suzy Stamps and I stamped them with Versafine ink on white cardstock using a MISTI tool. I drew a line with a pencil just to know where I wanted to cut. I trimmed the excess and I fussy cut all around the dog silhouette.

Infine ho preso un paio di timbri di Crackerbox & So Suzy Stamps e li ho timbrati con del Versafine nero su del cartoncino bianco usando il MISTI. Ho disegnato una linea con una matita, così da avere un riferimento per il taglio. Ho eliminato l'eccesso e ho ritagliato tutto intorno la silhouette del cane.


I kept this card simple, without any type of embellishment. The inks are beautiful, so easy to clean, blend, ink... they are so brilliant! Check them out here!

Ho mantenuto questa card piuttosto semplice, senza alcun tipo di decorazione. Gli inchiostri sono divini, facili da pulire, da sfumare, da inchiostrare... ed hanno dei colori decisi e brillanti! Scopriteli qui!


Supplies used:


Sweet Sixteen

Pixie Dust

Pet Heart set of 2

From your side

Dog silhouette

Share
Tweet
Pin
Share
2 commenti

Hello spooky friends! As I promise, today I'm going to share another project using the most inspiring images from the Crackerbox & So Suzy Stamps latest release. I wanted to make something different, so I went for some Halloween lollipop cards.

Buongiorno spaventevoli amici! Come promesso, oggi sono qui a condividere un altro progetto utilizzando alcune delle immagini dell'ultima release di Crackerbox & So Suzy Stamps che più mi hanno ispirato. Inoltre ho voluto creare qualcosa di diverso, per cui ho scelto di provare a fare delle lollipop cards a tema Halloween.


Unfortunately I forgot to take pictures during the creative process, but I only needed a doily, a long toothpick, a strip of black cardstock folded up and down, a glue gun and some patterned paper.

Purtroppo mi sono dimenticata di fare foto durante il processo creativo, ma c'è solo bisogno di un centrino, uno stuzzicadenti lungo, una striscia di cartoncino nero piegata avanti e indietro, una pistola a caldo e della carta pattern.


Then I stamped the carved pumpkin, the witches hat and the big potion onto a piece of Strathmore paper with Versafine Black Ink. I used the MISTI tool to do that: once I coloured the images with Prismacolor pencils, I stamped them again to make the edges pop. Next I fussy cut.

Poi ho timbrato la zucca scavata, il cappello da strega e la pozione grande su della carta Strathmore con dell'inchiostro Versafine. Per fare questo ho utilizzato il MISTI: una volta colorate le immagini con le matite Prismacolor, le ho timbrate nuovamente per far riemergere i bordi neri. Poi le ho ritagliate.


Once you have all your elements done, you only need to glue them together choosing the paper that matches better with your images. And that's all: these lollipops are so nice for home decorations, spooky ornaments or cards for kids!

Una volta che tutti gli elementi sono pronti, rimane solo da incollare tutto insieme scegliendo la carta che meglio si abbina alle varie immagini. E questo è tutto: questi lollipops sono davvero carini sia come decorazione per la casa sia come card per bambini!


Halloween is also one of the theme of the current challenge on Crackerbox & So Suzy Stamps blog, that is all about "All Holidays"! You can find more details here.

Halloween è anche uno dei temi della nuova sfida sul blog di Crackerbox e So Suzy Stamps, che è tutta dedicata a "All Holidays"! Trovi tutti i dettagli qui.


Supplies used:

Pumpkin Smiling
Potion Bottle Lg.
Witches hat
Share
Tweet
Pin
Share
No commenti

Hello stampers! Today I'm back with a Christmas card that I made for the new Crackerbox & So Suzy Stamps challenge, as the theme is "All Holidays"!


Ciao a tutti! Oggi sono qui con una card natalizia che ho realizzata per la nuova sfida sul blog di Crackerbox & So Suzy Stamps, che vede come tema "All Holidays"!


I used one of my current favorite technique: repeated stamping for backgrounds. This time I chose a little candy cane stamp and a dark grey cardstock, since I love how prismacolor pencils look on dark surfaces.

Ho utilizzato una delle mie (attuali) tecniche preferite: la timbrata ripetuta per sfondi personalizzati. Questa volta ho scelto il piccolo timbro con il bastoncino di zucchero e del cartoncino grigio scuro, visto che adoro l'effetto delle matite prismacolor sulle superfici scure.


First I stamped the candy cane trying to follow a sort of pattern with Versamark ink, I covered everything with white embossing powder and then heat embossed.

Quindi ho timbrato il bastoncino di zucchero cercando di seguire un motivo con dell'inchiostro Versamark, ho coperto tutto con della polvere bianca e ho embossato a caldo.


Then I coloured every candy cane using a couple of shades for each color.

Poi ho colorato ciascun bastoncino utilizzando un paio di tinte per ogni colore.


Finally I cut the panel in a half, adding two short strips of light grey cardstock in between. I placed the sentiment on a white cardbase and stamped it in red with the MISTI tool.

Infine ho tagliato il pannello in diagonale, aggiungendo due strisce fini di cartoncino grigio. Ho posizionato l'augurio su una base bianca e timbrato con inchiostro rosso e MISTI.


And that's it! If you want to get inspired and enter the challenge, please visit the main blog post!

E questo è tutto! Se vuoi lasciarti ispirare e partecipare alla sfida, visita il blog di Crackerbox & So Suzy Stamps!

Supplies used:

Candy cane

Merry Christmas

Share
Tweet
Pin
Share
1 commenti

Hi there! While I was on vacation I really missed my prismacolor pencils. Since I haven't used them for a while, I decided to put the box on my desk and try out some new color combinations. The final result was a little fairy, that I imagine working through the night: the perfect character for a little shaped card for the new Create a Smile challenge!


Ciao a tutti! Mentre quest'estate ero in vacanza, mi sono mancate tantissimo le matite prismacolor. Visto che, per di più, erano rimaste chiuse nella scatola per tanto tempo, ho deciso di metterle sulla scrivania e provare qualche combinazione di colore diversa dal solito. Il risultato finale è stata questa piccola fatina, che ho immaginato lavorare per tutta la notte: il personaggio perfetto per una piccola shaped card per la nuova sfida di Create a Smile!


For the background I blended some Distress Inks (in particular Salty Ocean, Faded Jeans, Chipped Sapphire and Black Soot) on a piece of watercolor paper that I previously die cut with an oval cool die by Create a Smile stamps. This is the base of my shaped card, that I can open and close by adhering another panel behind this one.

Per lo sfondo ho utilizzato un po' di Distress Inks (in particolare Salty Ocean, Faded Jeans, Chipped Sapphire e Black Soot) su della carta acquerellabile che ho precedentemente fustellato con uno dei cool dies ovali di Create a Smile stamps. Questa sarà la base della mia shaped card, che posso aprire e chiudere grazie ad un altro pannello identico incollato dietro a quello frontale.


To finish my background I heat embossed the sentiment in white and I used some embossing paste on the Wave of Stars stencil. Finally I glued the fairy that I coloured using these pencils: for the hair PC903, PC906 and PC1086, for the skin PC1059, PC1061 and PC1063, for the wings PC949. You have 2 weeks to join us here and be eligibile to win a 25€ gift certificate to the shop!

Per finire lo sfondo ho embossato una scritta in bianco e ho utilizzato dell'embossing paste sullo stencil Wave of Stars. Infine ho incollato la fatina che avevo precedentemente colorato utilizzando le matite: per i capelli PC903, PC906 e PC1086, per la pelle PC1059, PC1061 e PC1063, per le ali PC949. Avete 2 settimane per unirvi a noi qui e rischiare di vincere un coupon di 25€ per lo shop!
Share
Tweet
Pin
Share
No commenti
Newer Posts
Older Posts

About me

About me
I'm Giada, an italian cardmaker. I love clean and simple cards...and coloring critters! Thank for being here!

Follow Me

  • Facebook
  • Instagram
  • Youtube

Contact me

Nome

Email *

Messaggio *

Blog Archive

  • ▼  2023 (3)
    • ▼  nov 2023 (1)
      • Winter Friends
    • ►  giu 2023 (1)
    • ►  feb 2023 (1)
  • ►  2022 (14)
    • ►  ott 2022 (1)
    • ►  ago 2022 (1)
    • ►  lug 2022 (2)
    • ►  giu 2022 (1)
    • ►  mag 2022 (1)
    • ►  apr 2022 (1)
    • ►  mar 2022 (3)
    • ►  feb 2022 (1)
    • ►  gen 2022 (3)
  • ►  2021 (27)
    • ►  dic 2021 (1)
    • ►  nov 2021 (1)
    • ►  ott 2021 (2)
    • ►  set 2021 (2)
    • ►  ago 2021 (3)
    • ►  lug 2021 (2)
    • ►  giu 2021 (1)
    • ►  mag 2021 (2)
    • ►  apr 2021 (2)
    • ►  mar 2021 (2)
    • ►  feb 2021 (5)
    • ►  gen 2021 (4)
  • ►  2020 (72)
    • ►  dic 2020 (2)
    • ►  nov 2020 (2)
    • ►  ott 2020 (4)
    • ►  set 2020 (8)
    • ►  ago 2020 (4)
    • ►  lug 2020 (7)
    • ►  giu 2020 (8)
    • ►  mag 2020 (5)
    • ►  apr 2020 (12)
    • ►  mar 2020 (7)
    • ►  feb 2020 (7)
    • ►  gen 2020 (6)
  • ►  2019 (68)
    • ►  dic 2019 (6)
    • ►  nov 2019 (8)
    • ►  ott 2019 (9)
    • ►  set 2019 (9)
    • ►  ago 2019 (8)
    • ►  lug 2019 (8)
    • ►  giu 2019 (3)
    • ►  mag 2019 (4)
    • ►  apr 2019 (2)
    • ►  mar 2019 (3)
    • ►  feb 2019 (4)
    • ►  gen 2019 (4)
  • ►  2018 (59)
    • ►  dic 2018 (2)
    • ►  nov 2018 (7)
    • ►  ott 2018 (7)
    • ►  set 2018 (7)
    • ►  ago 2018 (7)
    • ►  lug 2018 (6)
    • ►  giu 2018 (4)
    • ►  mag 2018 (4)
    • ►  apr 2018 (4)
    • ►  mar 2018 (4)
    • ►  feb 2018 (3)
    • ►  gen 2018 (4)
  • ►  2017 (45)
    • ►  nov 2017 (6)
    • ►  ott 2017 (3)
    • ►  set 2017 (5)
    • ►  ago 2017 (3)
    • ►  lug 2017 (3)
    • ►  giu 2017 (3)
    • ►  mag 2017 (3)
    • ►  apr 2017 (5)
    • ►  mar 2017 (3)
    • ►  feb 2017 (6)
    • ►  gen 2017 (5)
  • ►  2016 (32)
    • ►  dic 2016 (1)
    • ►  nov 2016 (6)
    • ►  ott 2016 (3)
    • ►  set 2016 (3)
    • ►  ago 2016 (3)
    • ►  lug 2016 (4)
    • ►  giu 2016 (4)
    • ►  mag 2016 (2)
    • ►  apr 2016 (1)
    • ►  mar 2016 (2)
    • ►  feb 2016 (2)
    • ►  gen 2016 (1)
  • ►  2015 (21)
    • ►  dic 2015 (1)
    • ►  nov 2015 (2)
    • ►  set 2015 (1)
    • ►  ago 2015 (2)
    • ►  lug 2015 (1)
    • ►  mag 2015 (1)
    • ►  apr 2015 (2)
    • ►  mar 2015 (4)
    • ►  feb 2015 (4)
    • ►  gen 2015 (3)
  • ►  2014 (31)
    • ►  dic 2014 (2)
    • ►  nov 2014 (2)
    • ►  ott 2014 (2)
    • ►  set 2014 (4)
    • ►  ago 2014 (1)
    • ►  lug 2014 (3)
    • ►  giu 2014 (3)
    • ►  mag 2014 (3)
    • ►  apr 2014 (2)
    • ►  mar 2014 (3)
    • ►  feb 2014 (3)
    • ►  gen 2014 (3)
  • ►  2013 (33)
    • ►  dic 2013 (4)
    • ►  nov 2013 (5)
    • ►  ott 2013 (4)
    • ►  set 2013 (3)
    • ►  ago 2013 (4)
    • ►  lug 2013 (5)
    • ►  giu 2013 (8)

Search

Labels

  • crackerbox & suzy stamps
  • craftin desert divas
  • create a smile stamps
  • lawnfawn
  • mft stamps
  • rinea foiled paper
  • so suzy stamps
  • someoddgirl
  • whimsy stamps
  • wplus9

Created with by BeautyTemplates