Copyright giadaelesuenuvole.blogspot.it. Powered by Blogger.

giadalesuenuvole

Pagine

  • Chi sono
  • Privacy Policy

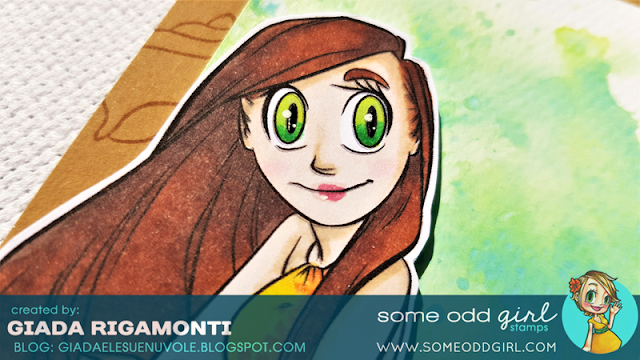
Hello guys! It's time for the monthly release by Some Odd Girl and the Mini Hula Girl is the digi stamp I chose to celebrate it. I decided to get inspired by the Hawaii line dancing, creating a sort of scene with 2 twins and the sentiment at the center.

Ciao a tutti! E' tempo della mini-release mensile di Some Odd Girl e la Mini Hula Girl è il timbro digitale che ho scelto per festeggiarla. Ho deciso di lasciarmi ispirare dalle danze di gruppo delle Hawaii, creando una sorta di scena con due gemelle e l'augurio al centro.


First I placed the digital images one in front of the other, leaving some white space between them. Then I printed and colored them with alcohol markers. At the center I drew a sort of panel with bamboo all around, I colored it too and I stamped a sentiment on top.

Prima di tutto ho posizionato le immagini digitali una di fronte all'altra, lasciando dello spazio bianco tra loro. Poi le ho stampate e colorate con i pennarelli ad alcohol. Al centro ho disegnato una sorta di pannello con intorno dei rami di bamboo, l'ho colorato e ho timbrato l'augurio al di sopra.


Finally I fussy cut the whole scene and put it on top of a brown patterned paper, using foam tape to add some dimension.

Infine ho ritagliato l'intera scena e l'ho posizionata al di sopra di una carta decorativa marrone, utilizzando del nastro gommato per dargli tridimensionalità.


I really love the look of this girl and all the possible scenes you can build with her!

Adoro l'aspetto di questa ragazzina e tutti gli possibili scenari che si possono costruire con lei protagonista!
Share
Tweet
Pin
Share
No commenti

Hello my friends! This is my last mermaid for this amazing Mermay month focused on Some Odd Girl. This one is a new digi called Mermaid Tunes, that I decided to match with the Reef background to create a one-layer card. This is one of my first attempts with this kind of composition, since I'm not a pro with alcohol marker coloring.

Ciao a tutti! Questa è l'ultima sirenetta per il mese Mermay tutto dedicato a Some Odd Girl. Questo è uno dei nuovi digi chiamato Mermaid Tunes, che ho deciso di abbinare alla scogliera per realizzare una card one-layer. Questo è uno dei miei primi tentativi con questo tipo di composizione, visto che non sono un'esperta di colorazione.


First of all I printed everything on a piece of white cardstock and colored - for the water I decided to use one shade of light blue only.

Prima di tutto ho stampato le immagini su del cartoncino bianco e le ho colorate - per l'acqua ho deciso di utilizzare soltanto una sfumatura di azzurrino.


I added some shadows here and there, especially under the tail of the mermaid, in order to make the scene more realistic.

Ho aggiunto qualche ombra qua e là, soprattutto sotto la coda della sirenetta, così da rendere la scena meno bidimensionale e più realistica.


I added some dots on the reef and the mermaid to give some interest to the card, since it's such a clean and simple project. On the top right corner I stamped the sentiment and glued everything on a black cardbase.

Ho aggiunto qualche puntino sulla scogliera e sulla sirenetta per aggiungere un po' di interesse alla card, visto che è un progetto semplice e senza fronzoli. Sull'angolo in alto a destra ho timbrato l'augurio e ho incollato il pannello su una base nera.
Share
Tweet
Pin
Share
No commenti


Hello friends! "Be fearless" is the sentiment by Crackerbox & Suzy Stamps that I chose for today's card. In my head, being afraid is not something negative: it means that you are focused and aware of what is going on (especially in this period). On the other hand, fear without control could be dangerous and make you stop believing in yourself, in your activities and dreams.

Ciao a tutti! "Be fearless" è la scritta di Crackerbox & Suzy Stamps che ho scelto di utilizzare nella card di oggi. Nella mia testa, avere paura non è qualcosa di totalmente negativo, nel senso che è un sentimento che permette di mantenerti focalizzata e consapevole di ciò che sta succedendo (specialmente in questo periodo). D'altro canto, paura senza controllo (ovvero il panico) può essere pericoloso e farti smettere di credere in te stessa, nelle tue attività e nei tuoi sogni.


First of all I blended 3 Distress Oxides on a strip of watercolor paper: Antique Linen, Broken China and Faded Jeans.

Prima di tutto ho sfumato 3 Distress Oxides su della carta da acquerello: Antique Linen, Broken China e Faded Jeans.


I set it aside to dry and heat embossed the Herb 1 with white embossing powder on top.

Ho lasciato da parte per far asciugare e ho embossato l'immagine Herb 1 con della polvere da embossing bianca.


At this point I stamped the first part of the Be Fearless sentiment with Versamark ink on black cardstock and heat embossed in white too. Then I fussy cut.

A questo punto ho timbrato la prima parte della scritta Be Fearless con dell'inchiostro Versamark su del cartoncino nero e ho embossato anche quello in bianco. Poi l'ho ritagliata.


Finally I put everything on a white panel and embossed it with a decorative embossing folder. I love the sentiment, which means "Don't be afraid to take a chance!"

Infine ho messo insieme il tutto su un pannello bianco precedentemente embossato grazie a un folder apposito. Mi piace l'augurio, che dentro di me recita "Non aver paura di buttarti!"


Supplies used:

Be fearless
Herb 1

Share
Tweet
Pin
Share
No commenti


Hello there! It's Mermay and so I had to color a mermaid - in particular, the Waiting Mermaid Mae digi stamp by Some Odd Girl. First of all, this month a lot of mermaids were designed and released - and I shared a couple of cards on Instagram too. As I'm still in the Mermay mood, I'm keeping on creating cards with different mermaids.

Ciao a tutti! E' Mermay e quindi mi sono sentita spronata a colorare una sirenetta - in particolare, il digi Waiting Mermaid Mae di Some Odd Girl. Prima di tutto, questo mese sono state rilasciate un po' di sirenette - e ho condiviso un paio di card su Instagram. Visto che sono ancora nel mood, penso di continuare a creare card utilizzando diverse sirenette. 


Today it's Waiting Mermaid Mae turn: I printed her on white cardstock, colored with alcohol markers and fussy cut. I decided to match her on a piece of watercolored paper where I put some Cracked Pistachio Distress Oxide with the ink smooshing technique. For my cardbase I chose a piece of brown cardstock, on which I stamped a little shell multiple times.

Oggi è appunto il turno di Wainting Mermaid Mae: l'ho stampata su del cartoncino bianco, colorata con pennarelli ad alcohol e ritagliata. Ho deciso di abbinare del cartoncino acquerellabile che avevo "sporcato" con il Distress Oxide Crackerd Pistachio grazie alla tecnica ink smooshing. Per la mia base ho scelto del cartoncino marrone, su cui ho timbrato più volte una piccola conchiglia.


One of my favorite touches is adding some shining dots on the tail of the mermaids with a gel pen! To make Mae pop even more, I glued her down with foam tape.

Uno dei miei tocchi finali preferiti consiste nell'aggiungere qualche scintillio sulla coda delle sirenette con della penna gel. Per far risaltare Mae ancora di più, l'ho incollata sulla base con del nastro adesivo.
Share
Tweet
Pin
Share
No commenti

Hello stampers! For today's card I chose the beautiful tulip stamp by Crackerbox & Suzy Stamps to create a clean and simple card with a little bit of coloring. The idea behind is so simple: using a image to create a pattern by stamping it multiple times.

Ciao ragazzi! Per la card di oggi ho scelto il bellissimo tulipano di Crackerbox & Suzy Stamps per realizzare una card pulita e semplice, con un poco di colorazione. 


I stamped the single tulip three times on a piece of white cardstock with Memento Tuxedo Black ink. Then I colored them with alcohol markers, two lillac and one yellow in the center.

Ho timbrato il tulipano 3 volte su del cartoncino bianco con dell'inchiostro Memento Tuxedo Black. Poi li ho colorati con i pennarelli ad alcohol , due vuola e una giallo al centro.


Then I took a piece of black cardstock to frame the front panel and a black strip to heat embossed the You're Amazing sentiment on it.

Poi ho preso del cartoncino nero per contornare il pannello frontale e una striscia di cartoncino nero per embossare la scritta You're Amazing in bianco.


I used a bit of foam tape to let the sentiment pop.

Ho usato un po' di nastro gommato per dare rilievo alla scritta.


It's so easy to create an elegant card with cool images like this one!

E' così semplice creare qualcosa di elegante con immagini sofisticate come questa!


Supplies used:

Tulip single
You're Amazing

Share
Tweet
Pin
Share
No commenti


Hello my friends! After lots and lots of coloring through the month of April, I finally decided to go back to basics with these two card, full of ink blending, heat embossing and die cutting techniques.

Ciao amici! Dopo aver condiviso un sacco di card con colorazione per tutto il mese di aprile, ho finalmente deciso di tornare alle basi con queste due card, ricche di inchiostro sfumato, embossing a caldo e fustellate.


First of all I built a customized heat embossed background by stamping the Leafy Branch Tall multiple times on brown cardstock. I decided to use white embossing powder to achieve a more dramatic look.

Prima di tutto ho messo insieme uno sfondo embossato timbrando più volte l'immagine Leafy Branch Tall su del cartoncino marrone. Ho deciso di utilizzare la polvere da embossing bianca per ottenere un effetto più drammatico.


Then I blended the edges with Vintage Photo Distress Ink and a little bit of Black Soot at the very edges, leaving the center lighter.

In seguito ho sfumato i lati con il Distress Ink Vintage Photo e anche un pochino di Black Soot proprio sui bordi.


Finally I die cut the word "wishes" in italian out of white cardstock and white foam. I glued every single piece of foam with the corresponding cardstock piece.

Infine ho fustellato la parola "auguri" da del cartoncino bianco e da del foam. Ho incollato ogni lettera in gomma con la corrispondente di cartoncino.


Finally I fixed everything on top of the panel, placing two letters per lines at the center.

Infine ho fissato il tutto su una base, posizionando 2 lettere alla volta al centro.


I did the same with a light blue cardstock, blended with Peacock Feathers, Mermaid Lagoon and Blueprint Sketch Distress Inks.

Ho seguito lo stesso procedimento con un cartoncino azzurro, sfumato con i Distress Inks Peacock Feathers, Mermaid Lagoon e Blueprint Sketch.


In this case I decided to use clear embossing powder for the leaves, which stands out less than the white ones. I love both the cards, especially because they could work for male and female recipients.

In questo caso ho deciso di utilizzare la polvere da embossing clear, che sicuramente risalta meno di quella bianca. Adoro entrambe le versioni, specialmente perché entrambe si adattano tanto a un destinatario maschile quanto femminile.


Supplies used:

Leafy Branch Tall

Share
Tweet
Pin
Share
No commenti


Hello stampers! It's the last day of April and so the last day of celebrations for Crackerbox & Suzy Stamps Anniversary. It was a busy month, full of new stamps, blog hops, prizes and inspirations. To celebrate our Anniversary Blog Hop and close our month of celebrations, we have a great surprise. For the anniversary, our friend Den Nichols from Simply Charming gave us 2 amazing So Suzy Tote Bags for part of our prizes - you'll find more info at the end of the post. Today I'm focusing on another new flower stamp - the large Sunflower.


Ciao a tutti! E' l'ultimo giorno di Aprile, per cui è anche l'ultimo giorno di festeggiamenti per l'anniversario di Crackerbox & Suzy Stamps. E' stato un mese impegnativo, pieno di nuovi timbri, blog hop, premi e ispirazione. Per l'anniversario, la nostra amica Den di Simply Charming regalerà due delle sue bellissime Tote Bags come parte dei premi - troverete maggiori info in fondo al post. Oggi mi sono dedicata a un altro dei nuovi timbri floreali - il grande Girasole.


I stamped it on white cardstock and colored with alcohol markers. I made 2 sunflowers, because at the beginning I was struggling with the shades of colors. For the first one I used orange and yellow colors.

L'ho timbrato su del cartoncino bianco e colorato con i pennarelli ad alcohol. Ho realizzato due girasoli, visto che all'inizio ero indecisa sulle combinazioni di colore da usare. Alla fine ho optato per l'arancione e il giallo per il primo.


For the second one I went for a more vintage look, using brown and yellow shades. 

Per il secondo ho scelto delle sfumature più vintage, ovvero il marrone e il giallo.


After coloring and fussy cutting everything, I decided to kept both of them and cut the foliage.

Dopo aver colorato e ritagliato il tutto, ho deciso di tenerli entrambi e di tagliare via tutte le foglie.


Next I die cut a tag from kraft cardstock and chose a piece of patterned paper that I used as a background.

In seguito ho fustellato una tag da del cartoncino kraft e ho scelto della carta patterned da utilizzare come sfondo.


I stamped the Amazing sentiment on a strip of white cardstock and I put everything together, using regular and foam tape. These will be our anniversary prizes:

- First Prize: So Suzy Tote Bag plus a surprise package of stamps. Value over $100 dollars.
- Second Prize: So Suzy Tote Bag and set of stamps. Value over $80.00 dollars
- Third Prize: $50 dollars gift card valid at Crackerbox & Suzy Stamps.

In order to entered to win, you need to hop along with us and comment in each participant blog. Hoppers must comment in all stops along the way! You have until May 7, 2020 at 11:59 pm ET to leave your comment. Each participant will pick one winner and then we will sort the prizes between the picked names. Winners will be announced on May 14th on Crackerbox & Suzy Stamps blog!


Crackerbox & Suzy Stamps
Vicky Briggs
Martha Lucia Gomez
Ceal Pritchett
Steph Ackerman
Larissa Collins Pitman
Teresa DeWitt Pierce
Tracy McLennon
Cornelia Wenokor
Giada Rigamonti (you're here)
Donna Idlet
Lindsday Adreon
Ericka Strange
Maria Pilar
Shanna Slater
Melinda Beltran
Nadine Carlier
Den Nichols

Ho timbrato la scritta Amazing su del cartoncino bianco e ho messo tutto insieme, utilizzando nastro normale e gommato. Per vincere uno dei premi in palio, dovrete lasciare un commento sotto ogni partecipante della hop che trovate qui sopra - avete tempo fino al 7 maggio alle ore 11:59 pm EST. I 3 fortunati vincitori verranno estratti a sorte e saranno annunciati il 14 maggio!


Supplies used:

Sunflower Lg.
You're Amazing

Share
Tweet
Pin
Share
12 commenti
Newer Posts
Older Posts

About me

About me
I'm Giada, an italian cardmaker. I love clean and simple cards...and coloring critters! Thank for being here!

Follow Me

  • Facebook
  • Instagram
  • Youtube

Contact me

Nome

Email *

Messaggio *

Blog Archive

  • ▼  2023 (3)
    • ▼  nov 2023 (1)
      • Winter Friends
    • ►  giu 2023 (1)
    • ►  feb 2023 (1)
  • ►  2022 (14)
    • ►  ott 2022 (1)
    • ►  ago 2022 (1)
    • ►  lug 2022 (2)
    • ►  giu 2022 (1)
    • ►  mag 2022 (1)
    • ►  apr 2022 (1)
    • ►  mar 2022 (3)
    • ►  feb 2022 (1)
    • ►  gen 2022 (3)
  • ►  2021 (27)
    • ►  dic 2021 (1)
    • ►  nov 2021 (1)
    • ►  ott 2021 (2)
    • ►  set 2021 (2)
    • ►  ago 2021 (3)
    • ►  lug 2021 (2)
    • ►  giu 2021 (1)
    • ►  mag 2021 (2)
    • ►  apr 2021 (2)
    • ►  mar 2021 (2)
    • ►  feb 2021 (5)
    • ►  gen 2021 (4)
  • ►  2020 (72)
    • ►  dic 2020 (2)
    • ►  nov 2020 (2)
    • ►  ott 2020 (4)
    • ►  set 2020 (8)
    • ►  ago 2020 (4)
    • ►  lug 2020 (7)
    • ►  giu 2020 (8)
    • ►  mag 2020 (5)
    • ►  apr 2020 (12)
    • ►  mar 2020 (7)
    • ►  feb 2020 (7)
    • ►  gen 2020 (6)
  • ►  2019 (68)
    • ►  dic 2019 (6)
    • ►  nov 2019 (8)
    • ►  ott 2019 (9)
    • ►  set 2019 (9)
    • ►  ago 2019 (8)
    • ►  lug 2019 (8)
    • ►  giu 2019 (3)
    • ►  mag 2019 (4)
    • ►  apr 2019 (2)
    • ►  mar 2019 (3)
    • ►  feb 2019 (4)
    • ►  gen 2019 (4)
  • ►  2018 (59)
    • ►  dic 2018 (2)
    • ►  nov 2018 (7)
    • ►  ott 2018 (7)
    • ►  set 2018 (7)
    • ►  ago 2018 (7)
    • ►  lug 2018 (6)
    • ►  giu 2018 (4)
    • ►  mag 2018 (4)
    • ►  apr 2018 (4)
    • ►  mar 2018 (4)
    • ►  feb 2018 (3)
    • ►  gen 2018 (4)
  • ►  2017 (45)
    • ►  nov 2017 (6)
    • ►  ott 2017 (3)
    • ►  set 2017 (5)
    • ►  ago 2017 (3)
    • ►  lug 2017 (3)
    • ►  giu 2017 (3)
    • ►  mag 2017 (3)
    • ►  apr 2017 (5)
    • ►  mar 2017 (3)
    • ►  feb 2017 (6)
    • ►  gen 2017 (5)
  • ►  2016 (32)
    • ►  dic 2016 (1)
    • ►  nov 2016 (6)
    • ►  ott 2016 (3)
    • ►  set 2016 (3)
    • ►  ago 2016 (3)
    • ►  lug 2016 (4)
    • ►  giu 2016 (4)
    • ►  mag 2016 (2)
    • ►  apr 2016 (1)
    • ►  mar 2016 (2)
    • ►  feb 2016 (2)
    • ►  gen 2016 (1)
  • ►  2015 (21)
    • ►  dic 2015 (1)
    • ►  nov 2015 (2)
    • ►  set 2015 (1)
    • ►  ago 2015 (2)
    • ►  lug 2015 (1)
    • ►  mag 2015 (1)
    • ►  apr 2015 (2)
    • ►  mar 2015 (4)
    • ►  feb 2015 (4)
    • ►  gen 2015 (3)
  • ►  2014 (31)
    • ►  dic 2014 (2)
    • ►  nov 2014 (2)
    • ►  ott 2014 (2)
    • ►  set 2014 (4)
    • ►  ago 2014 (1)
    • ►  lug 2014 (3)
    • ►  giu 2014 (3)
    • ►  mag 2014 (3)
    • ►  apr 2014 (2)
    • ►  mar 2014 (3)
    • ►  feb 2014 (3)
    • ►  gen 2014 (3)
  • ►  2013 (33)
    • ►  dic 2013 (4)
    • ►  nov 2013 (5)
    • ►  ott 2013 (4)
    • ►  set 2013 (3)
    • ►  ago 2013 (4)
    • ►  lug 2013 (5)
    • ►  giu 2013 (8)

Search

Labels

  • crackerbox & suzy stamps
  • craftin desert divas
  • create a smile stamps
  • lawnfawn
  • mft stamps
  • rinea foiled paper
  • so suzy stamps
  • someoddgirl
  • whimsy stamps
  • wplus9

Created with by BeautyTemplates