Copyright giadaelesuenuvole.blogspot.it. Powered by Blogger.

giadalesuenuvole

Pagine

  • Chi sono
  • Privacy Policy

Hi friends! I hope you had some time for craft during the summer. As I returned form my vacation, there was the new fabulous release from So Suzy Stamps waiting for me. Guess what? It's all about Christmas. I mean, in Italy we don't celebrate Thanksgiving and Halloween that much, so we are already looking for the Holiday Season. Most of the stamps are designed by Olesya, and a few ones by Terri: both are in the DT, I'm so proud of them!
Go ahead to see all the great surprises we have for you!

Buongiorno! Spero che abbiate trovato il tempo di creare un po' durante l'estate. Per quel che mi riguarda, appena tornata dalle vacanze mi sono avventata sulla fantastica nuova release di So Suzy Stamps che stava solo aspettando me. E indovinate un po'? E' tutta sul Natale. Insomma, in Italia non festeggiamo il Ringraziamento o Halloween, non più di tanto almeno. Per cui molte di noi sono già proiettate alle card natalizie. Buona parte dei timbri realizzati sono stati disegnati da Olesya, e alcuni anche da Terri: entrambe sono nel DT ed io sono così fiera di essere loro amica!
Leggete fino in fondo, le sorprese non sono ancora finite!


This is my first Christmas card of the year. It's a time consuming card, that's true: the type of card you'd like to give to someone special. At first I thought of a scene on a standard card base, but as soon as I stamped all my elements I changed my mind for something different. Let's start!

Questa è la mia prima card natalizia dell'anno. Si tratta di un biglietto che porta via molto tempo, lo ammetto: esattamente quel tipo di card che daresti a qualcuno di speciale. All'inizio ho pensato di creare una scena, ma non appena ho stampato tutte le immagini ho cambiato idea e ho optato per qualcosa di differente. Cominciamo!


First, I choose a couple of stamps from the new release: the tree, the car and the gift pile. They matches perfectly together, so I stamped the car first, I masked it and stamped 2 trees on each side. To finish it off, I added the gifts on top of the car.

Prima di tutto, ho scelto un paio di timbri dalla nuova release: l'albero, la macchina e la pila di regali. Le immagini si incastrano perfettamente tra loro, quindi ho cominciato stampando per prima la macchina, poi l'ho mascherata e ho timbrato due alberi per lato. Per finire, ho timbrato anche i regali in cima alla macchina.


At this point I found out it would be cool if I cut off all the upper part of the panel, following the line of the images.

A questo punto ho capito che sarebbe stato meglio tagliare tutta la parte alta del fronte della card, seguendo la linea delle immagini.


Then I coloured all my images using promarker pens. It took a few time, but it was worth it. Do you see the white dots on the tree and on the car too? I used a white gel pen for achieving a snowy effect.

Poi ho colorato tutte le mie immagini usando i promarker. Mi ci è voluto un po' di tempo, ma ne è valsa la pena. Vedete i puntini bianchi sugli alberi e sulla macchina? Ho usato una penna gel bianca per rendere l'effetto della neve.


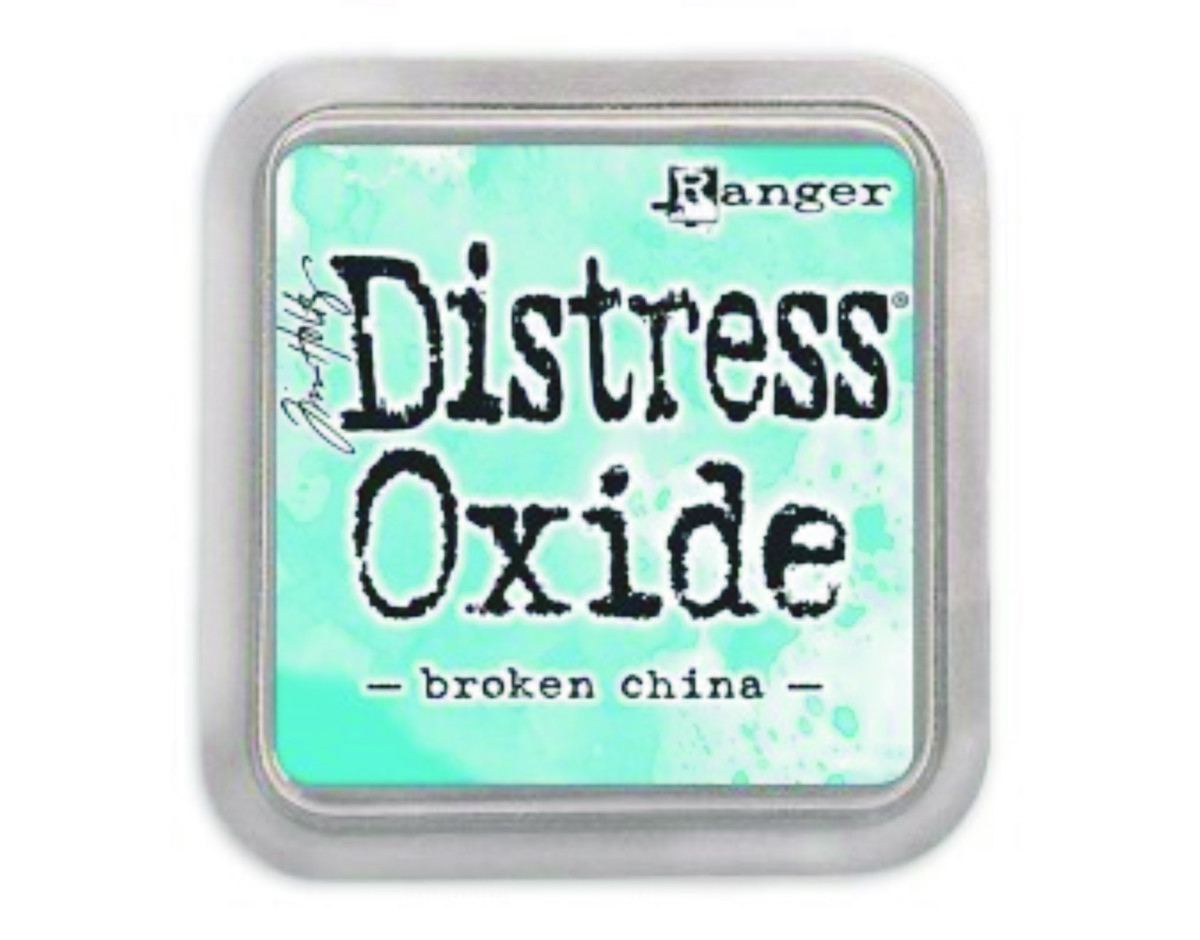
I masked off all the images and blended some Walnut Stain Distress Oxide for the ground. Next I opened the card and worked on the inside: I just blended some Broken China Distress Oxide, adding little snowflakes stamps from the new release as well.

Ho mascherato tutte le immagini e ho aggiunto un po' di Distress Oxide Walnut Stain per il terreno. In seguito ho aperto la card e ho sistemato l'interno: ho aggiunto anche qui del Distress Oxide Broken China, aggiungendo dei piccoli fiocchi di neve della nuova release.


Finally I stamped the sentiment with some Versafine Black Ink. As you can see, I almost forgot to explain how I fixed all the blended area of my coloring: I glued down a piece of brown cardstock on the inside, event if a white one should have been better.

Infine ho timbrato l'augurio con del Versafine nero. Come potete vedere, mi sono quasi dimenticata di spiegare come ho aggiustato l'area colorata che si vedeva anche all'interno della card: ho incollato del cartoncino marrone all'interno, anche se con il senno di poi sarebbe stato meglio usare il bianco.


A bit of glossy accent on the car glass as final touch and that's all!
I invite you to check out all the amazing cards made by this wonderful DT - and all the stamps of this release too: they are almost 30 and are becoming my favourite! Great deals are waiting for you too:


Un po' di glossy accent sul vetro della macchina come tocco finale et voilà!
Vi invito a dare un'occhiata a tutte le card create dal mio fantastico team - e a soffermarvi anche su tutti i nuovi timbri disponibili: sono quasi 30 e stanno diventando i miei preferiti! E guardate tutte le offerte attive!


Supplies list:

Olesya's car

Tree by Olesya
Gift pile

Snowflakes by Olesya SM
Happy Light Merry

Share
Tweet
Pin
Share
No commenti

Hi! I'm still enjoying the August release from So Suzy Stamps making a quick and easy card: you only need a Distress Oxide of your choice, a couple of stamps and a black ink.

Continuo a divertirmi con la nuova release di So Suzy Stamps: ho creato una card facile e veloce, per cui servono solo un Distress Oxide a scelta, un paio di timbri e dell'inchiostro nero.


I started by creating my own background: I picked up my Broken China Distress Oxide and I sponged it in the middle of a piece of regular cardstock. After applying some layers of ink, I let it dry and I sprinkled some drops of water.

Prima di tutto mi sono concentrata sullo sfondo: ho preso il mio Distress Oxide Broken China e l'ho applicato al centro di un cartoncino bianco. Dopo aver aggiunto diversi strati di inchiostro, ho lasciato asciugare e ho spruzzato delle gocce d'acqua.


At this point I grabbed my MISTI and I stamped the two clusters of solid butterflies - both the smaller and the bigger ones- few times, using Versafine Black Ink. 
Thanks to the MISTI, I could stamp the same images 2 or 3 times for achieving a better impression.

A questo punto ho preso il MISTI e ho timbrato i due gruppi di farfalle - sia il piccolo che il grande - più volte, usando il Versafine nero. Grazie al MISTI, ho potuto timbrare le stesse immagini anche 3 volte, così da ottenere una stampata migliore.


I added the sentiment from previous releases with the same ink and I added a touch of Wink of stella on the wings of the butterflies.

Ho aggiunto la scritta di una precedente release con lo stesso inchiostro e ho aggiunto un tocco di Wink of stella sulle ali delle farfalle.


This is a close-up of the dreamy effect of the panel, which I really love. I think it could be a great layout for sympathy cards too - never easy to made, for me. Hope that you like it - I swear, only 15 minutes needed!

Ecco un dettaglio dell'effetto trasognato della card, che mi piace davvero molto. Penso che sarebbe un fantastico layout anche per una card di condoglianze - mai semplice da fare, almeno per me. Spero che vi piaccia - e lo giuro, bastano 15 minuti!


Supplies used:


Butterflies Solid Lg.

Butterflies Sm. Solid

Celebrate

Broken China Distress Oxide

Share
Tweet
Pin
Share
No commenti

"Without change there would be no butterflies" - maybe this is why I love butterflies. Plus, they are such detailed and colorful. So I wanted to try this design from the So Suzy Stamps latest release so far! I made this one-layer card using masking technique, stamping and some coloring.

"Senza cambiamento non esisterebbero farfalle" - e forse è proprio per questo che le farfalle mi piacciono particolarmente. In più, sono così ricche di dettagli e di colori. Proprio per questo morivo dalla voglia di provare questo design della nuova release di So Suzy Stamps! Ho creato una card senza elementi tridimensionali, utilizzando del masking, un po' di timbrate e un pizzico di colorazione.


First of all, I stamped a bunch of Monarch butterflies on a piece of white cardstock, one near to the other, rotating the stamp time to time to create a sort of pattern. This stamp is quite big, so there were room only for 4 butterflies. I stamped them with Memento Tuxedo Black because I was going to use promarkers.

Prima di tutto, ho timbrato un po' di farfalle, una vicino all'altra, ruotando il timbro di volta in volta, su del cartoncino bianco. Questo timbro è abbastanza grande, per cui sono riuscita a farci stare solo 4 farfalle. Le ho timbrate con del Memento Tuxedo Black, visto che avevo intenzione di colorarle con i promarkers.


I stamped the newest sentiment, which is very long: I decided to only use the first two lines. This is a great way to stretch your stamps!

Ho timbrato il nuovo augurio, che appunto è molto lungo: ho deciso di utilizzare solo le prime due righe. In questo modo si può ottenere il massimo da un timbro!


At this point I chose a warm color palette, which means that all the butterflies were coloured with oranges and yellows. I also add a little bit of shading with some grey all around the wings. You could use rainbow colors or keep the card black and white... I just love how the elegant design of the butterfly just made the card!

A questo punto ho scelto una palette di colori caldi, così ho colorato tutte le farfalle con arancioni e gialli. Ho anche aggiunto un po' di tridimensionalità aggiungendo un po' di grigio intorno alle ali. Si possono scegliere anche i colori dell'arcobaleno, o mantenere tutto bianco e nero... adoro come basti il design elegante delle farfalle a tenere in piedi l'intera card!


I mounted the panel on a black card base. I didn't add any embellishment or sparkling element to keep the card as simple as possible: I love how the butterflies catch the eyes!

Ho incollato il pannello su una base nera. Non ho aggiunto alcuna decorazione, lasciando la card il più semplice possibile: le farfalle così catturano ancora di più l'attenzione!


Supplies used:

Monarch
Happiest moments

Share
Tweet
Pin
Share
4 commenti

New releases are like Christmas to me, and today we're celebrating the romantic release from So Suzy Stamps with a Blog Hop - at the end of the post you'll find more information!


This release was entirely designed by our talented Olesya (great job, dear) and for my card I focused on a couple of stamps: the bouquet, the single tulip and a part of the new sentiment as well. I decided to keep it simple with a clean background and a bit of coloring... so let's see how I made it!

Le release sono come Natale per me (l'attesa, la sorpresa...e via dicendo): oggi festeggiamo proprio la nuova, romantica release di So Suzy Stamps. Come? Con un Blog Hop - alla fine del post trovate tutte le informazioni!
Questa release è stata interamente disegnata dalla nostra bravissima Olesya (gran bel lavoro, cara) e per la mia card mi sono concentrata su 3 timbri: il bouquet, il singolo tulipano e una parte della nuova scritta. Ho deciso di mantenere il tutto molto semplice, con uno sfondo pulito ed un po' di colorazione... vediamo come ho fatto!


First of all, I stamped all the images I needed for the coloring process: as I noticed that the single tulip matches perfectly the bouquet, I stamped both of them with Memento Tuxedo Black and I colored with promarker pens. I chose green and pink because I love how they look together! Then I fussy cut.

Prima di tutto, ho timbrato tutte le immagini necessarie per la colorazione: essendomi accorta che il singolo tulipano stava perfettamente nel bouquet, ho timbrato entrambi con del Memento e li ho colorati con i promarkers. Ho scelto il verde ed il rosa perché stanno bene insieme - o almeno, a me piace molto l'abbinamento! Poi ho ritagliato meticolosamente il tutto.


At this point I picked up a green paper with polka dots but I needed something extra to make the flowers pop a bit more. Instead of using ribbon, twine or geometric dies, I decided to create a small envelope with my Envelope Punch Board. On one side, I stamped the last part of the sentiment.
Now that all my elements were ready, I glued down the patterned paper on a card base and set the bouquet as if was going out the envelope. I used some 3D foam tape for the single tulip, in order to give some dimension.

A questo punto ho scelto una carta color verde, ma mi sono anche accorta che avrei avuto bisogno di qualcosa di più per far risaltare i fiori. Invece di utilizzare nastri, twine o fustellate geometriche, ho optato per una piccola busta realizzata con l'Envelope Punch Board. Da un lato, ho stampato l'ultima parte della scritta.
Ora che tutti i miei elementi erano pronti, ho incollato la carta decorativa sulla base e fissato il bouquet come se stesse uscendo dalla busta. Ho usato del nastro gommato per il singolo tulipano, per dare tridimensionalità al tutto.


You could add Nuvo Drops, sequins, wink of stella and other finishing touches... as I said, I wanted to keep it simple. Hope that you like it! This bouquet is quite huge, it makes the card and it's perfect for romantic occasions (wedding, congratulations card, birthdays and so on).
So... here we are with the Blog Hop: just hop with us, joining all the beautiful creations and spreading some love through your comments. You will be elegible for a 25$ gift certificate on So Suzy Stamps Shop: the winner will be announced on August 10th.

Potete aggiungere Nuvo Drops, strass, glitter e altri tocchi finali... come ho già scritto, io ho voluto mantenerla il più semplice possibile. Spero che il risultato vi piaccia! Questo bouquet è abbastanza grande, praticamente crea da solo la card ed è perfetto per le occasioni romantiche (nozze, congratulazioni, compleanni e cose così).
Così... eccoci al Blog Hop: seguiteci e unitevi ai festeggiamenti, commentando tutte le bellissime creazioni del DT. In questo modo potrete partecipare all'estrazione di un buono di 25$ nello shop di So Suzy Stamps: il vincitore sarà dichiarato il 10 agosto.

So Suzy Stamps
Giada (you're here)
Olesya
Josefine
Martha
Cornelia
Terri

Good luck and happy stamping!


Supplies used:

Tulips


Single tulip

Happiest moments

Share
Tweet
Pin
Share
34 commenti

They are new, but almost everyone knows what Distress Oxides are. 
As usual I needed time to decide to buy them - and which colors as well. Finally I chose two pads from So Suzy Stamps shop: Broken China (the first Distress Ink I purchased years ago) and Walnut Stain (never had as Distress Ink). This is my first attempt with Oxides and the theme for my card is, obviously, "magic".

Sono nuovi, ma quasi tutti sanno già cosa sono i Distress Oxides.
Come sempre mi ci è voluto tempo per decidere di comprarli - e, oltretutto, su che colori concentrarmi. Alla fine ne ho scelti due dallo shop di So Suzy Stamps: Broken China (il primo Distress Ink che ho acquistato in assoluto anni fa) e Walnut Stain (mai utilizzato come Distress Ink). Questo è il mio primissimo tentativo con gli Oxide ed il tema per la card è, ovviamente, "magia".


I started by blending Broken China and Walnut Stain Distress Oxides: I put a lot of pigment onto a piece of watercolor paper, beginning from the center to the border. When I was satisfied, I sprinkled some waterdrops onto the paper, let them react with the inks and set aside to dry.

Ho cominciato applicando i due Oxides Broken China e Walnut Stain, lasciando sul foglio di carta acquarellabile un bel po' di pigmento, partendo dal centro e proseguendo sui bordi. Quando sono rimasta soddisfatta del risultato, ho spruzzato un po' d'acqua sul foglio, ho lasciato che reagisse con gli inchiostri e ho lasciato asciugare.


Then I picked some new stuff you can find on So Suzy Stamps Shop: the Sugar Glitter Paste and the "Oh my Stars" stickable stencil from BoBunny. I set the stencil on the top left corner of the paper and I added glitter paste on some of the stars, as the fairy was sending them from the right corner of the card. Next I cleaned up the stencil and I let the paste dry.

In seguito ho utilizzato un po' di nuove cosine che si possono trovare nel negozio di So Suzy Stamps: la pasta glitterata "sugar" e lo stencil "Oh my Stars" entrambi di BoBunny. Ho posizionato lo stencil nell'angolo in alto e ho aggiunto la pasta glitterata su alcune stelle, come se la fata le stesse inviando dall'angolo opposto della card. Ho ripulito lo stencil e ho lasciato asciugare.


Finally I stamped the Dancing Fairy from So Suzy Stamps multiple times with Versafine Black Ink. As final touches, I added some dots all around the stars with white gel pen. This is the final result: so clean but so cool, right? And yes, I love how Oxides look!

Infine ho stampato la Fata Danzante di So Suzy Stamps diverse volte con del Versafine nero. Come tocco finale, ho aggiunto dei puntini tutt'intorno alle stelle con una penna bianca. Questo è il risultato finale: così pulito ma così bello, vero? Eh sì, adoro come gli Oxides rimangono impressi su carta!


And what about the shimmer of the glitter paste? It seems that this fairy is surrounded by shooting stars!

E cosa dire della brillantezza della pasta glitterata? Sembra proprio che questa fatina sia circondata da stelle cadenti!


Supplies used:

Dancing Fairy

Sugar Glitter Paste
Broken China Distress Oxide

Stencil "Oh My Stars"

Walnut Stain Distress Oxide


Share
Tweet
Pin
Share
No commenti


Hi guys! Summer is here... and what could I celebrate after ice-cream? The sea and its creatures, of course!
So I'm sharing this card with the adorable octopus from So Suzy Stamps, which I had in my stash for a long time. It has great dimension, so I wanted to keep it as main focus of my card.

Ciao ragazzi! L'estate è qui... e cosa avrei potuto festeggiare, dopo i gelati? Il mare e le sue creature, ovviamente!
Per cui condivido questa card con l'adorabile polpo di So Suzy Stamps, che avevo ormai da un po'. Ha una dimensione non indifferente, così ho deciso di tenerlo come focus principale della card.


I started by blending a piece of watercolor paper with Distress Inks - from the top: Cracked Pistachio, Peacock Feathers and Salty Ocean. I let it dry and I sprinkled some water drops to give more interest to the underwater background.

Ho cominciato applicando su della carta per acquarello tre Distress Inks - dall'alto: Cracked Pistachio, Peacock Feathers e Salty Ocean. Ho lasciato asciugare e ho spruzzato delle gocce d'acqua per dare più dettagli allo sfondo subacqueo.


Next I stamped Pluto the octopus with Versafine Black ink and I sponged it with Seedless Preserves Distress Ink, adding Chipped Sapphire for the shadows and white dots with a gel pen.

Poi ho timbrato Pluto il polpo con del Versafine nero e l'ho colorato con del Distress Ink Seedless Preserves, aggiungendo anche del Chipped Sapphire per le ombre e punti bianco con la penna gel.


Then I stamped the "Happy Birthday" sentiment at the bottom of the panel. I fixed Pluto with an action wooble and at this point I decided to add a couple of googly eyes to make the octopus funny.
Finally I glued down this piece onto a white cardbase, and that's all.

Successivamente ho timbrato l'augurio "Happy Birthday" nella parte bassa del pannello. Ho incollato Pluto con una molla e a questo punto ho deciso di renderlo più divertente aggiungendo un paio di occhietti dinamici. Infine ho incollato il tutto su una base per biglietti bianca.


Isn't it the coolest octopus you've ever seen?!

Non è il polpo più figo che abbiate mai visto?!


Supplies used:

Pluto - octopus
Simple Birthday

Share
Tweet
Pin
Share
No commenti

Hello my friends!
Summer is here and it's finally time to eat ice-creams... a lot of ice-creams! So I chose this yummy stamp from So Suzy Stamps to make a bright shaker card.

Buongiorno amici!
L'estate è arrivata ed è finalmente tempo di mangiare gelati… una scorpacciata di gelati! Per cui ho scelto questo timbro delizioso di So Suzy Stamps per realizzare una shaker card dai colori brillanti.


I started by picking a piece of white cardstock and a stencil. I grabbed Cracked Pistachio Distress Ink and I started to blend it from the center.

Ho cominciato prendendo del cartoncino bianco e uno stencil. Ho utilizzato il Distress Ink "Cracked Pistachio" e ho cominciato ad aggiungere colore dal centro del foglio con il blending tool.


Then I die cut one ring from white cardstock and two from crafty foam, that would be the base of my shaker. I die cut also a circle from acetate, plus I stamped the sentiment. I was thinking about deleting the word "cupcakes" and adding "ice-cream"... maybe next time!

Poi ho fustellato 3 anelli: uno partendo dal cartoncino bianco, altri due da dei fogli gommati. Questa è la base della parte "shaker", con l'aggiunta di un cerchio in acetato. Ho timbrato l'augurio, che stavo pensando di modificare: cancellare la parola "cupcakes" per aggiungere "ice cream"… magari la prossima volta!


At this point I filled the window with glitters and tiny beads and glue all onto the front panel. Finally I stamped and coloured two different ice-creams with Antique Linen Distress Ink, and I tried some no-line coloring with promarkers. I decided to use only the larger one, on which I added some Clear Nuvo Crystal Drops on top.

A questo punto ho riempito la finestra con glitter e piccoli beads, incollando il tutto sul pannello della card. Infine ho timbrato due diversi gelati con il Distress Ink "Antique Linen", e ho provato la tecnica della colorazione "no-line" con i promarkers. Ho deciso di utilizzare solo quello più grande, su cui ho applicato uno strato di Nuvo Crystal Drops trasparente.


Shaker cards are so funny and easy to make! Do you want ice-creams too?

Le shaker cards sono davvero divertenti e facili da fare! Fatemi indovinare: volete anche voi un gelato ora?


Supplies used:

Ice-cream cone


Life without cupcakes


Share
Tweet
Pin
Share
No commenti
Newer Posts
Older Posts

About me

About me
I'm Giada, an italian cardmaker. I love clean and simple cards...and coloring critters! Thank for being here!

Follow Me

  • Facebook
  • Instagram
  • Youtube

Contact me

Nome

Email *

Messaggio *

Blog Archive

  • ▼  2023 (3)
    • ▼  nov 2023 (1)
      • Winter Friends
    • ►  giu 2023 (1)
    • ►  feb 2023 (1)
  • ►  2022 (14)
    • ►  ott 2022 (1)
    • ►  ago 2022 (1)
    • ►  lug 2022 (2)
    • ►  giu 2022 (1)
    • ►  mag 2022 (1)
    • ►  apr 2022 (1)
    • ►  mar 2022 (3)
    • ►  feb 2022 (1)
    • ►  gen 2022 (3)
  • ►  2021 (27)
    • ►  dic 2021 (1)
    • ►  nov 2021 (1)
    • ►  ott 2021 (2)
    • ►  set 2021 (2)
    • ►  ago 2021 (3)
    • ►  lug 2021 (2)
    • ►  giu 2021 (1)
    • ►  mag 2021 (2)
    • ►  apr 2021 (2)
    • ►  mar 2021 (2)
    • ►  feb 2021 (5)
    • ►  gen 2021 (4)
  • ►  2020 (72)
    • ►  dic 2020 (2)
    • ►  nov 2020 (2)
    • ►  ott 2020 (4)
    • ►  set 2020 (8)
    • ►  ago 2020 (4)
    • ►  lug 2020 (7)
    • ►  giu 2020 (8)
    • ►  mag 2020 (5)
    • ►  apr 2020 (12)
    • ►  mar 2020 (7)
    • ►  feb 2020 (7)
    • ►  gen 2020 (6)
  • ►  2019 (68)
    • ►  dic 2019 (6)
    • ►  nov 2019 (8)
    • ►  ott 2019 (9)
    • ►  set 2019 (9)
    • ►  ago 2019 (8)
    • ►  lug 2019 (8)
    • ►  giu 2019 (3)
    • ►  mag 2019 (4)
    • ►  apr 2019 (2)
    • ►  mar 2019 (3)
    • ►  feb 2019 (4)
    • ►  gen 2019 (4)
  • ►  2018 (59)
    • ►  dic 2018 (2)
    • ►  nov 2018 (7)
    • ►  ott 2018 (7)
    • ►  set 2018 (7)
    • ►  ago 2018 (7)
    • ►  lug 2018 (6)
    • ►  giu 2018 (4)
    • ►  mag 2018 (4)
    • ►  apr 2018 (4)
    • ►  mar 2018 (4)
    • ►  feb 2018 (3)
    • ►  gen 2018 (4)
  • ►  2017 (45)
    • ►  nov 2017 (6)
    • ►  ott 2017 (3)
    • ►  set 2017 (5)
    • ►  ago 2017 (3)
    • ►  lug 2017 (3)
    • ►  giu 2017 (3)
    • ►  mag 2017 (3)
    • ►  apr 2017 (5)
    • ►  mar 2017 (3)
    • ►  feb 2017 (6)
    • ►  gen 2017 (5)
  • ►  2016 (32)
    • ►  dic 2016 (1)
    • ►  nov 2016 (6)
    • ►  ott 2016 (3)
    • ►  set 2016 (3)
    • ►  ago 2016 (3)
    • ►  lug 2016 (4)
    • ►  giu 2016 (4)
    • ►  mag 2016 (2)
    • ►  apr 2016 (1)
    • ►  mar 2016 (2)
    • ►  feb 2016 (2)
    • ►  gen 2016 (1)
  • ►  2015 (21)
    • ►  dic 2015 (1)
    • ►  nov 2015 (2)
    • ►  set 2015 (1)
    • ►  ago 2015 (2)
    • ►  lug 2015 (1)
    • ►  mag 2015 (1)
    • ►  apr 2015 (2)
    • ►  mar 2015 (4)
    • ►  feb 2015 (4)
    • ►  gen 2015 (3)
  • ►  2014 (31)
    • ►  dic 2014 (2)
    • ►  nov 2014 (2)
    • ►  ott 2014 (2)
    • ►  set 2014 (4)
    • ►  ago 2014 (1)
    • ►  lug 2014 (3)
    • ►  giu 2014 (3)
    • ►  mag 2014 (3)
    • ►  apr 2014 (2)
    • ►  mar 2014 (3)
    • ►  feb 2014 (3)
    • ►  gen 2014 (3)
  • ►  2013 (33)
    • ►  dic 2013 (4)
    • ►  nov 2013 (5)
    • ►  ott 2013 (4)
    • ►  set 2013 (3)
    • ►  ago 2013 (4)
    • ►  lug 2013 (5)
    • ►  giu 2013 (8)

Search

Labels

  • crackerbox & suzy stamps
  • craftin desert divas
  • create a smile stamps
  • lawnfawn
  • mft stamps
  • rinea foiled paper
  • so suzy stamps
  • someoddgirl
  • whimsy stamps
  • wplus9

Created with by BeautyTemplates